Saturday, May 28, 2016

Systems Check for Toledo

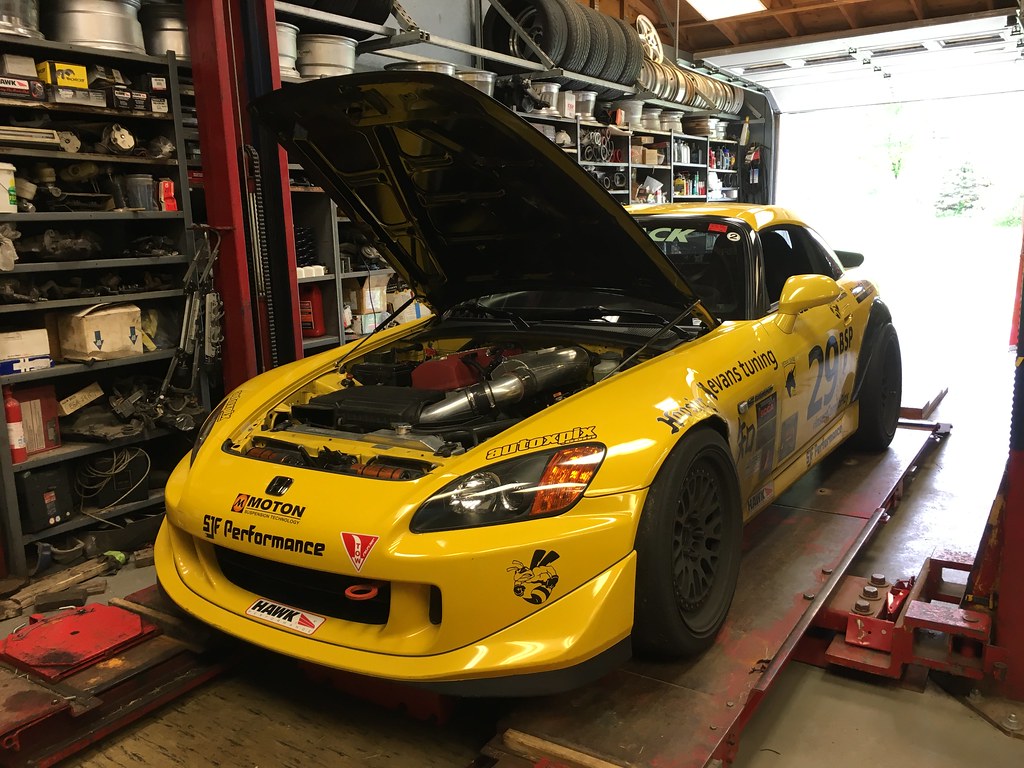
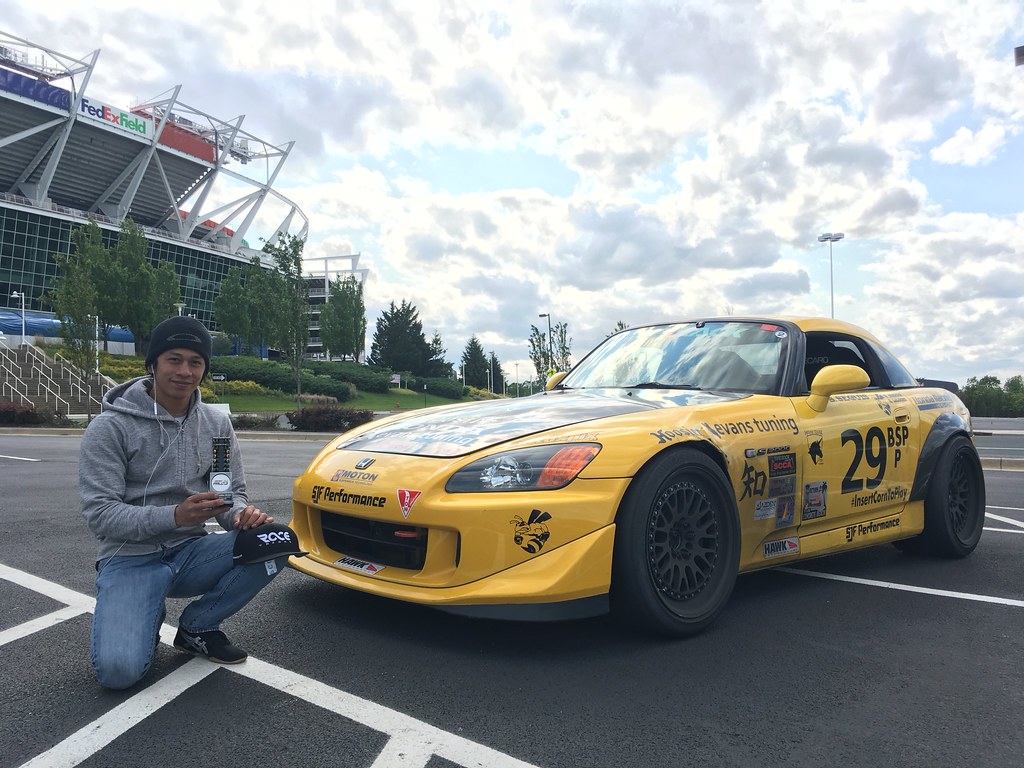
The Toledo ProSolo is only 2 weeks away and today was our last chance to do a shake down of the new battery wiring and verify that the weird sputtering/misfire behavior we observed towards the end of day 2 at the DC ProSolo had been fixed by this. There were 37 drivers running Pro index and the fast nationals style course made the event extra fun. Also, it doesn't get more "memorial day weekend" than seeing 94F temperatures during our heat. This is such stark contrast to the near 40F weather we had on day 2 of the DC ProSolo. Go figure that mother nature would go directly from Winter to Summer and skip Spring altogether.

NNJR SCCA - Meadowlands, NJ - 5/28/2016
The heat made for some interesting changes to the car's balance. We had to revisit our tire pressure differential front to rear in order to compensate for the increased rear grip right out of the gate. Thankfully, Bumblestook is so finely balanced now that a small 1 psi change is all that's needed to shift the balance enough to make a significant difference. We were also fighting heat soak on the ITBs and oil temps were running quite a bit hotter than I'd like due to the relatively fast driver change overs providing minimal cool down time between runs.

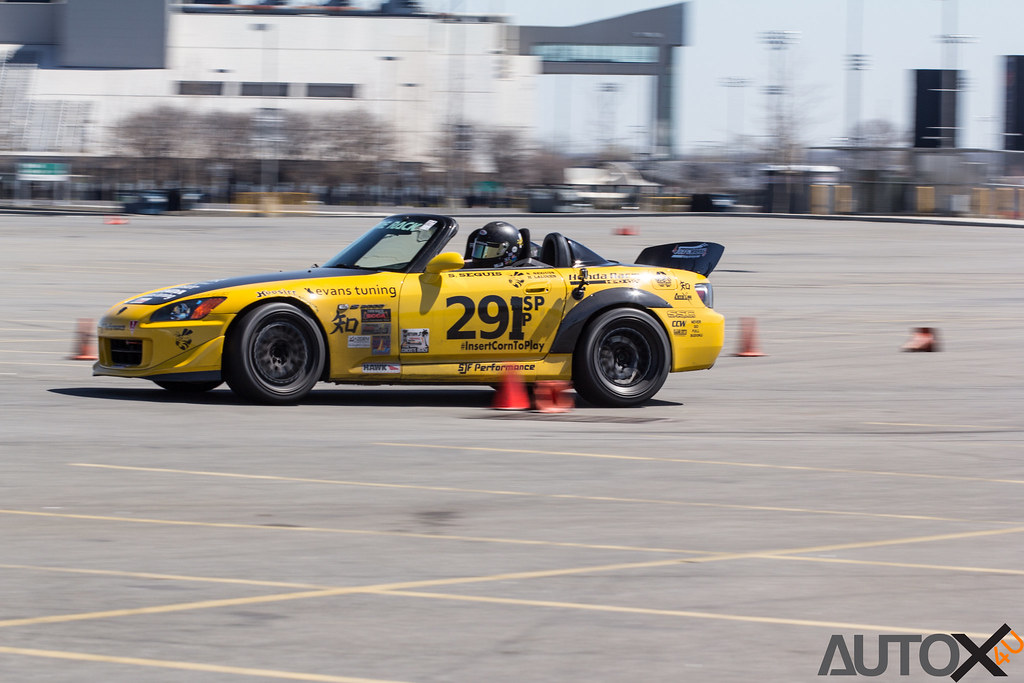
Even though we were going to get 6 runs each, Hez and I were both focused on thinking more like we would during big events with plenty of early aggression. We put in decent times but my desire to try and get closer to the cones to shave a tenth here and there resulted in most of my fast runs being in cone trouble. The video of our fastest times below shows my fastest dirty scratch time and you can see I'm nowhere near the cones on the left so I must be turning in too early on the right and hitting cones on that side. I'll have to work on adjusting my visual cues to shift where I think my car is by about 2 inches to the left and I should be both faster and cleaner.


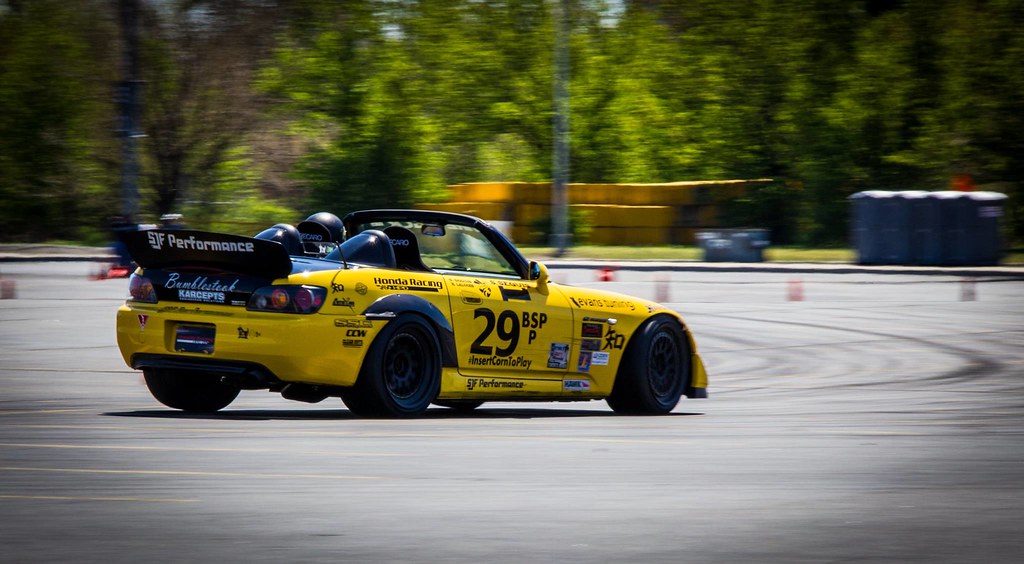
NNJR SCCA - 5/28/2016

More importantly Bumblestook felt good today. With higher temps during the big events coming up, we're going to be switching from pump gas back to ethanol for Toledo so we were just trying to use up the left over gas in the tank. This meant running lower than ideal fuel levels and we both had occurrences of fuel starve with the high G sustained sweepers after fast slaloms giving us grief. You can hear a bit of it in my run as I try to power through the walloms after the right hand sweeper in the bowl. I'm ok with that because the rest of the time, we didn't encounter any misfires though my TPS is still frequently throwing a voltage range error but doesn't seem to result in any problem with power delivery. She's going back on the dyno at Evans Tuning when I come back from Toledo just to have her checked out properly before Nationals.

Hez was able to get Bumblestook into 3rd spot in Pro with his fast run. I think the car had the pace to vie for top spot as Hez's fastest clean run wasn't without several instances of him sliding around and counter steering so there was plenty of time left to be had. My fastest clean run was achieved by dialing back (a bit too much unfortunately) so I languished all the way down in 16th. Oddly, despite the heat exhaustion today, I had plenty of fun and was generally quite happy with my early run aggression. If I can make those moves stick and stay away from cone trouble then I think the necessary driving improvements can be achieved.

Sunday, May 22, 2016

Fixing Electrical Gremlins

Although we had a successful result at the DC ProSolo last week, it wasn't without issue. The clamp going to the negative terminal of the battery had vibrated loose after all those launches causing all kinds of weird TPS and engine misfire problems. This wasn't the first time this happened so to fix this issue permanently it was back to SJF Performance to find a solution.

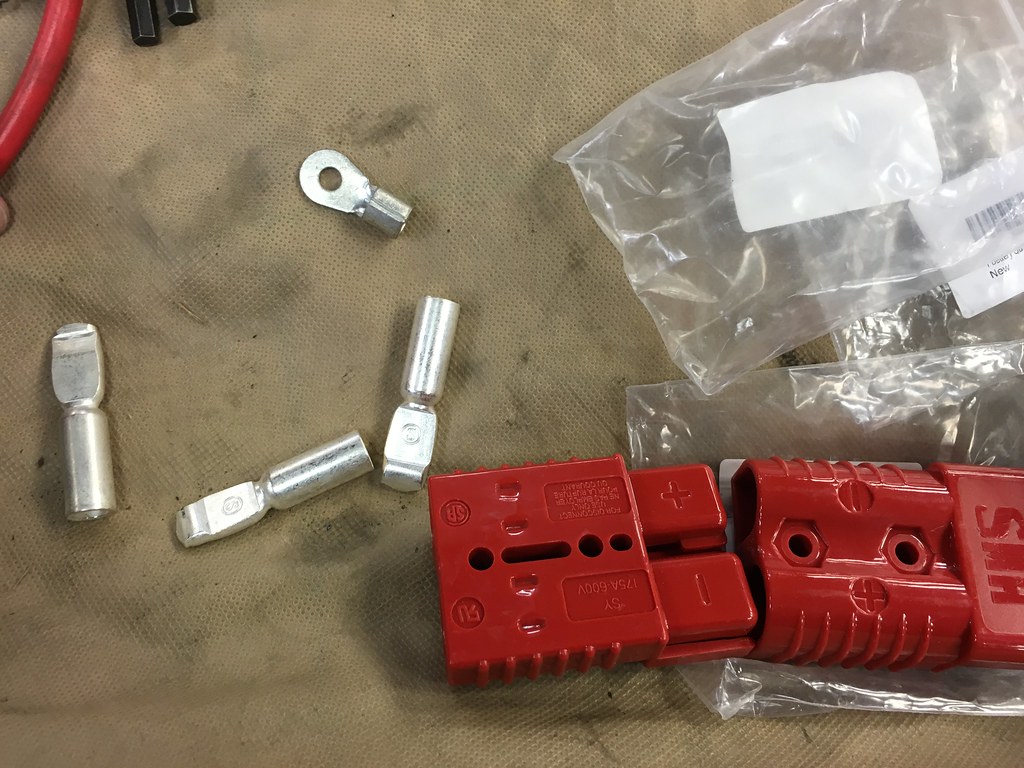
175A @ 600V Battery Quick Connect Kit
I picked up a Battery Quick Connector kit rated at 175A at 600V from Amazon.com  that's normally used for winches or fork lifts and wanted to see if SJF could figure out how we could wire this up on my car. Since I don't have power at Bumblestook's storage, I take the battery home after every event to charge and I wanted a way to easily disconnect the cable but also provide a stable and secure connection.

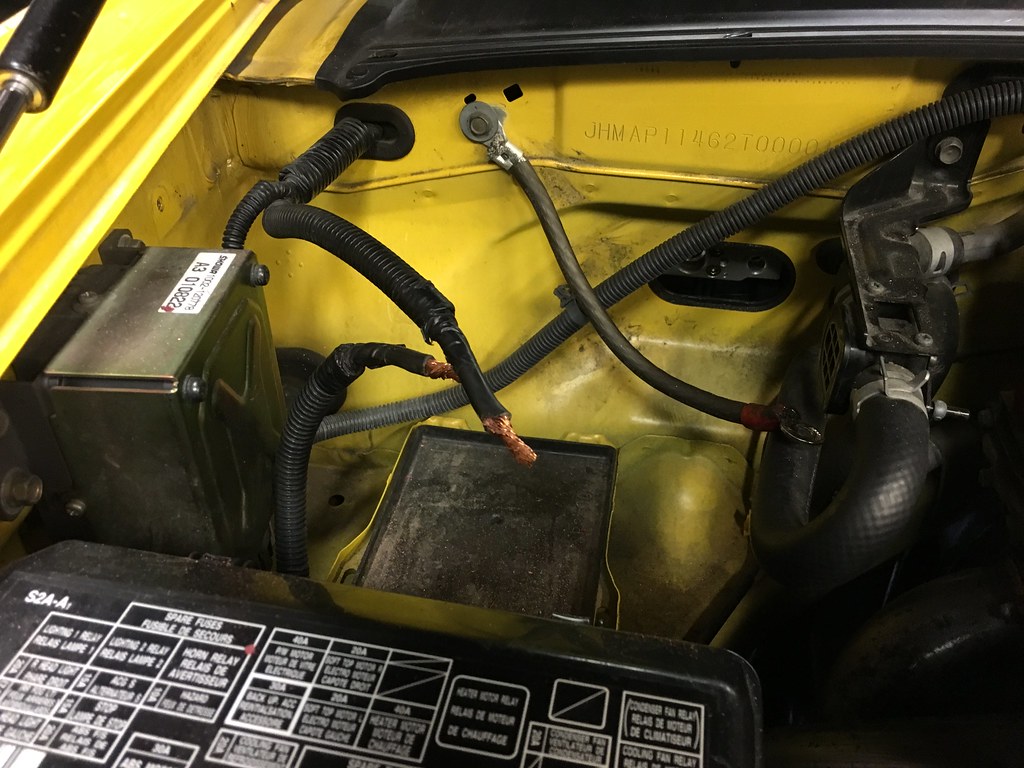
Old battery setup with inline kill switch
Battery terminals clipped off - 5/22/2016
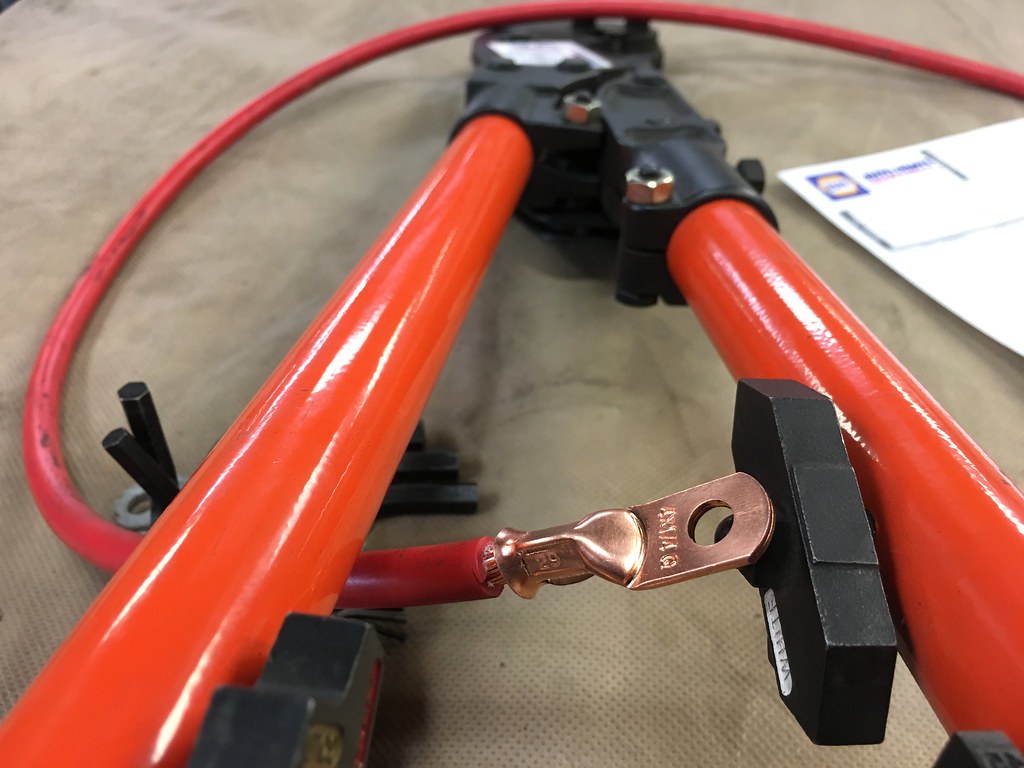
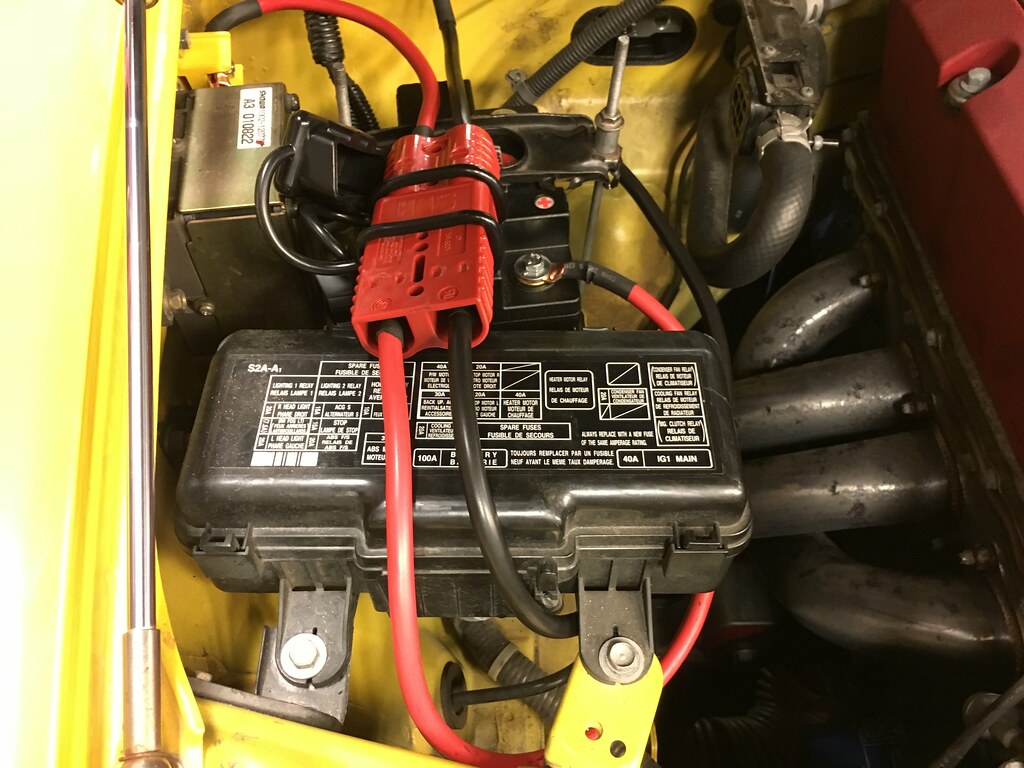
The first order of business was to remove the terminal ends off the existing wiring. The ground going to the chassis was a 2-gauge wire but ended up being a 4-gauge wire after the kill switch and there are two 4-gauge wires connected to the positive terminal for the starter and the rest of the car electronics. The battery quick connector was designed for 2-gauge wire but you can't fit two 4-gauge wires into it so Steve had to figure out something else. Thankfully he had a spare junction box sitting around (in yellow too!) and the two existing 4-gauge positive terminal wires were hooked up to it along with one more new 4-gauge wiring going to the quick connect. It was also fortunate that Steve had this gigantic crimping tool that could be used to crimp connectors onto these thick wires.

Connector crimped on for the junction box
All positive side wires connected to junction box
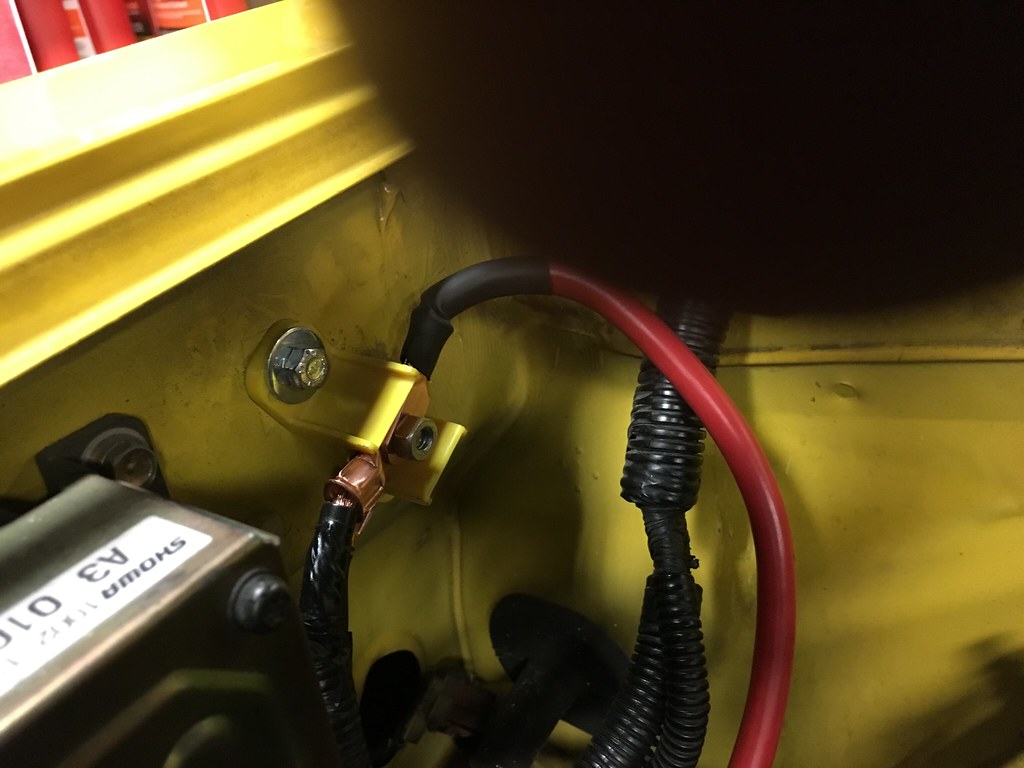
For the ground wire, we didn't like the existing ground on there so Steve replaced it with a new 4-gauge wire with fresh terminals crimped on that didn't have oversized holes for a perfect fit. The other end of the ground wire went into one of the quick connect ends as well.

New ground wire installed
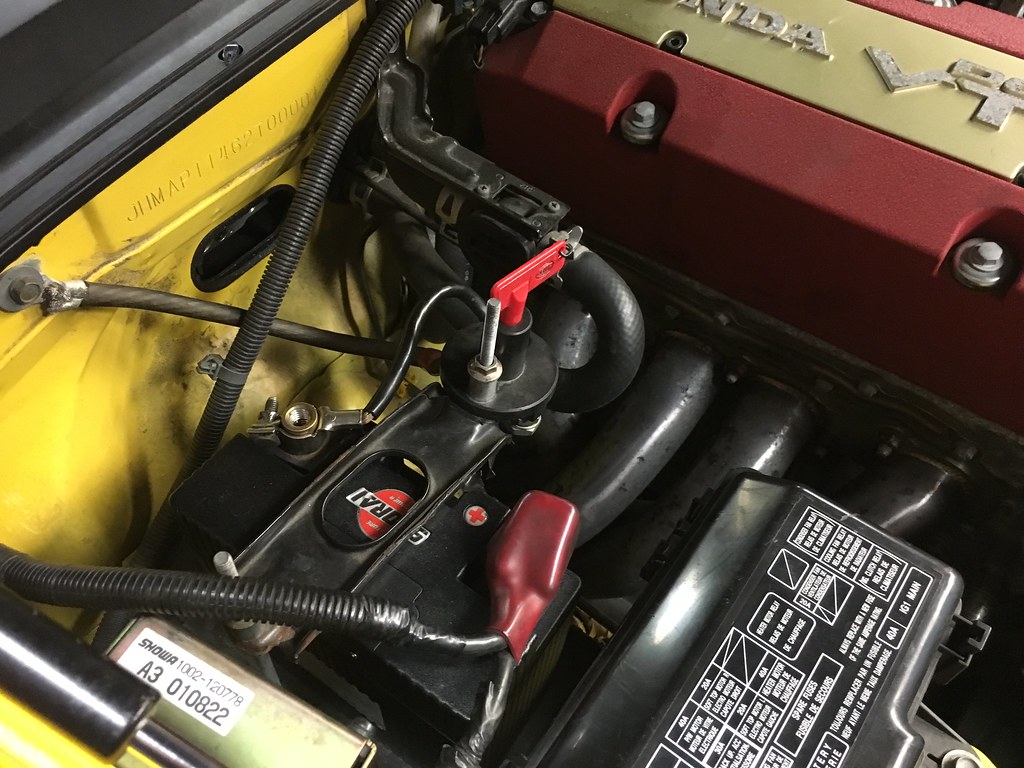
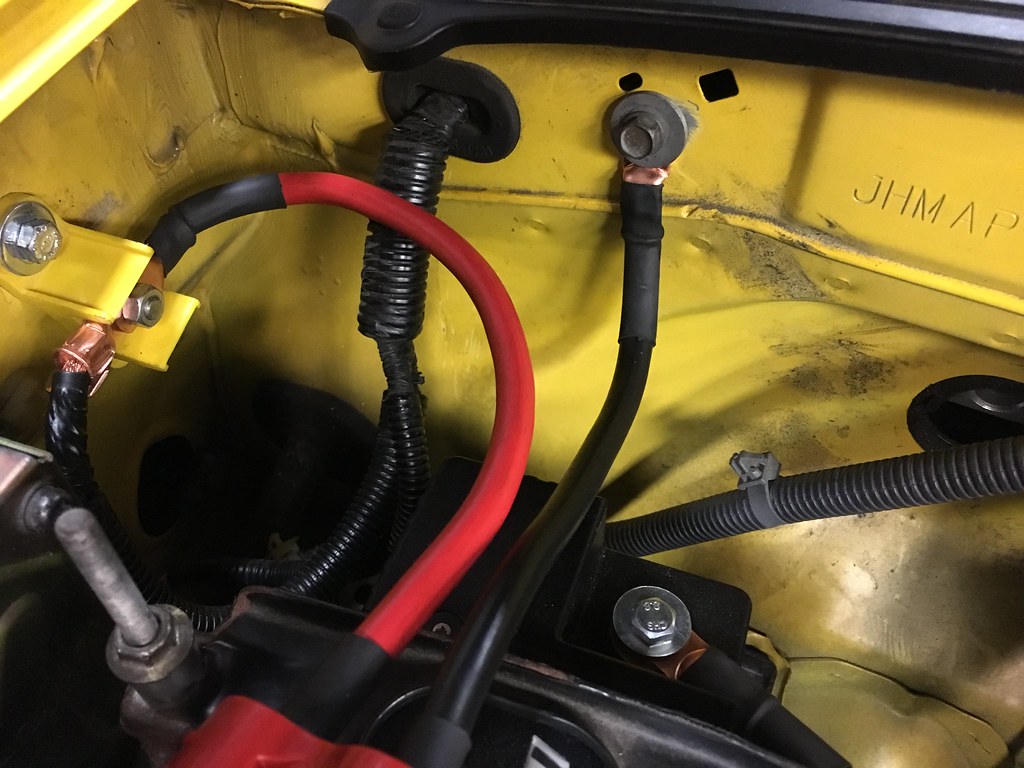
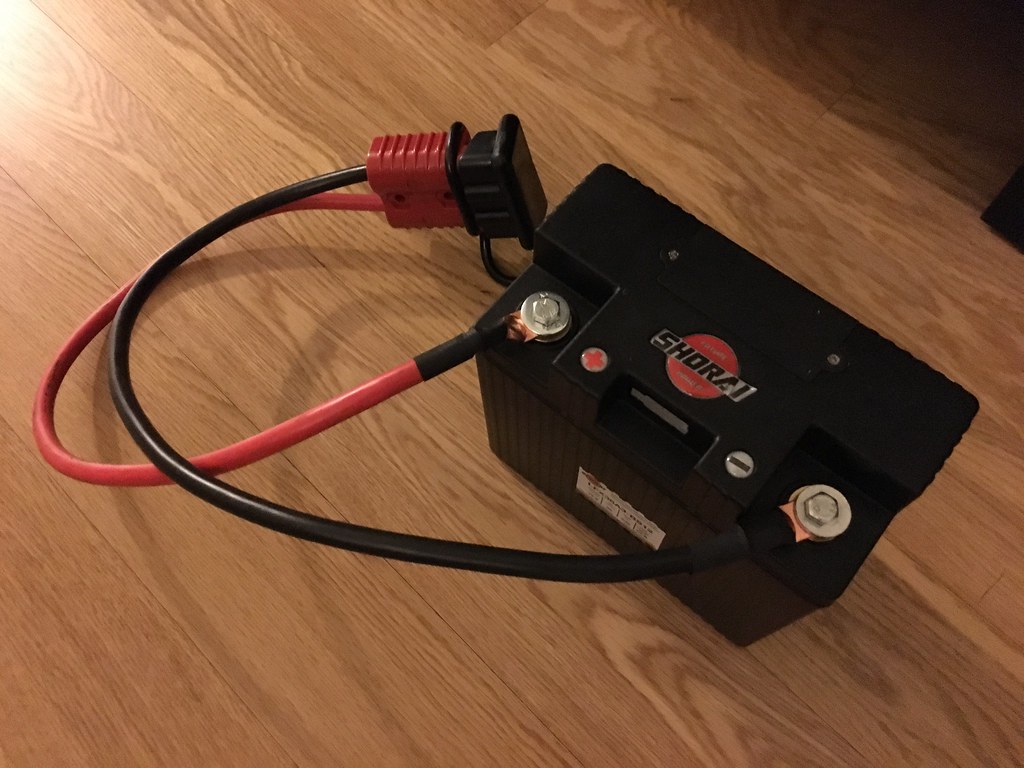
On the battery side, we unbolted the SAE automotive battery terminals from the Shorai battery and instead bolted on 4-gauge wires with new ends to the other quick connect box. The result was a clean and perfect connection that's super easy for me to disconnect whenever I need to pull the battery out or when I'm towing long distances and don't want any draw. I also got the dust caps for each side of the quick connect to avoid any accidental shorts when the two sides are disconnected. The car started up perfect with a clean reading on the voltage by the ECU.

Quick connect installed - 5/22/2016
Shorai with quick connect at home - 5/22/2016
We also flushed the diff fluid and inspected for any potential problems after the ProSolo and so far everything seems good. No differential pieces came out of the drain plug so we've got a green light to test the car this weekend before heading to Toledo next month.

SJF Performance - 5/22/2016

Monday, May 16, 2016

BSP win at the DC ProSolo 2016

We had a successful first national event this past weekend at the DC ProSolo. Bumblestook competed in BSP driven by Hez and myself and also in L1 (combined with L3) by Tamra Hunt. We had a perfect 1, 2 team finish in BSP with Hez taking his first ProSolo win, me coming a close second, and Tamra fighting a good uphill battle (literally) and ended up taking a podium 3rd in the L1/L3 combined Ladies class.

Hez taking the BSP win at the DC ProSolo - 5/15/2016
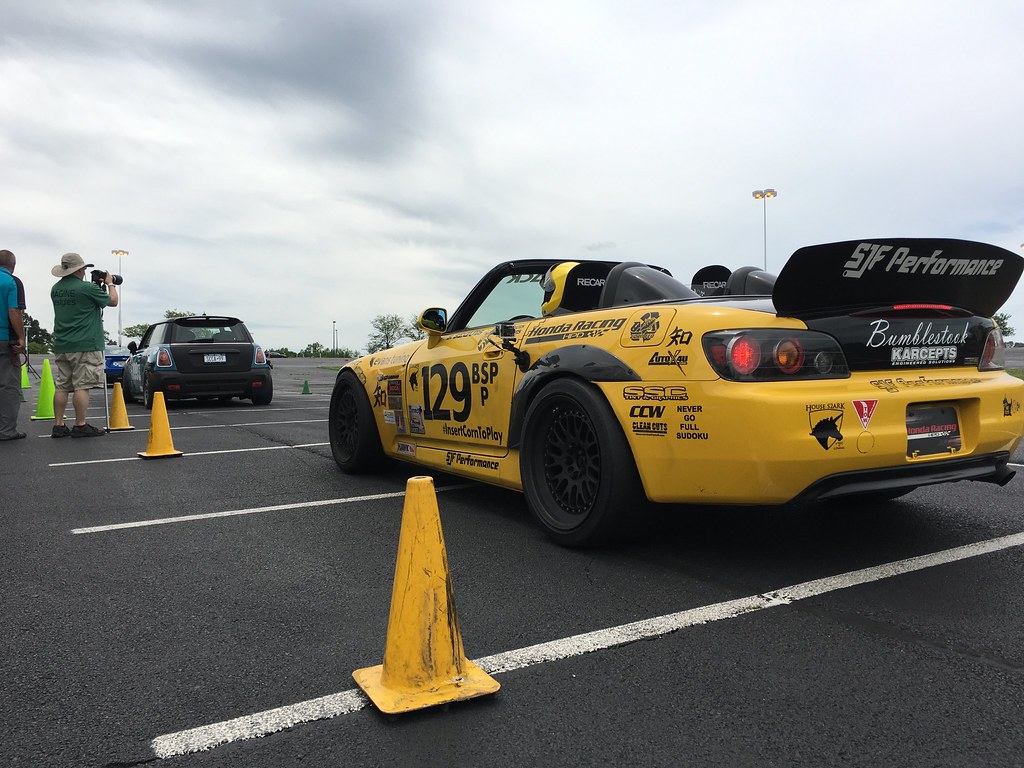
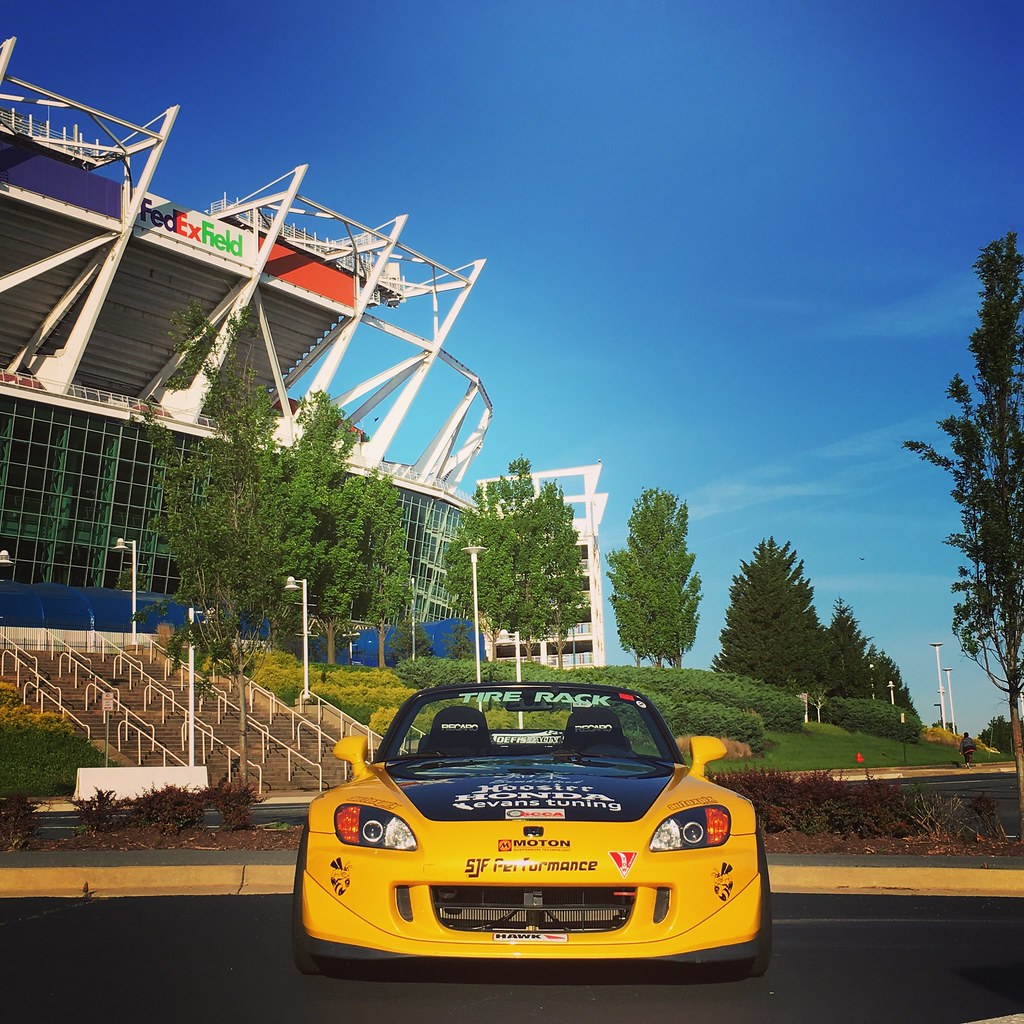
We left bright and early on Friday for FedEx field but took our time since the forecast for the day was rain in the afternoon so we figured we wouldn't be able to get any practice starts anyway. When we arrived we were surprised that the weather was holding up so we took the opportunity to put on our competition tires and get 2 practice starts each. With an uphill start, fairly slick sealed asphalt surface, and the new LED start lights used in ProSolo this year, getting the RPM and timing right would be critical to getting good times. We found launching at around 6000rpm at the 3rd yellow light to be most effective allowing enough tire spin to minimize potential damage to the differential. We also took on a last minute change, bringing Tamra onboard to run Bumblestook in Ladies class. This would give us both an opportunity to get early valuable feedback on the car's balance since Ladies class always runs first and give us a shot at winning more tires. I don't normally just let anyone drive Bumblestook. The minimum requirement is that you own a S2000 yourself but I also have to feel you gel well with the car. In this case Tamra both owns a S2000 and drove the car late last year as part of my annual "beehive" where I was able to see up front whether the respect for the car was there so I felt comfortable letting her take the reins this time.

Lining up for starts

Practice Starts - 5/13/2016

We walked the course and was surprised because ProSolos are supposed to have no more than a 150ft straight after the start before the left and right courses split (http://www.scca.com/articles/1999456-2016-prosolo-plans-a-letter-from-howard-duncan-senior-director-of-solo-and-rally). This is to make the courses more fair and not favor just high power cars. Instead, what we found was almost a 500ft straight going uphill and only a few simplistic corners and a small slalom at the finish. This was super bad news for us because we produce the least torque of all the cars in BSP. It's true a BSP S2000 is fairly light but we give up a lot of forward acceleration with our big wheels (heavy rotating mass) in order to do transitions very quickly and make just marginally more power over STR.

Ready to race - Day 1 - DC ProSolo
Day 1 morning heat started and Tamra took her first runs. She was still getting used to the car and put in relatively safe runs slotting her into 4th. In the afternoon, she found much more pace (as did others) as the tracks got rubbered in and the temps had risen to a comfortable 75F and moved up into 3rd spot, only 0.2 seconds away from 2nd and 0.5 seconds away from 1st. For my runs, I found the right side course much easier to read and put down a good right side run but got lost on my first left side and overshot the turn around on my 2nd run while simultaneously coning to make matters worse. Hez put in a nice quick time on the left side right out of the gate but struggled with the right side course. Unfortunately our run group was running last and we got hit with a torrential downpour with howling winds in the afternoon and we opted to skip the afternoon runs and not risk damaging the car. Hez was faster than me on the left side by half a second but I was faster than him on the right side by a full second so I found myself in the lead going into day 2 by half a second. My left side runs were all dirty and so were Hez's right side runs.

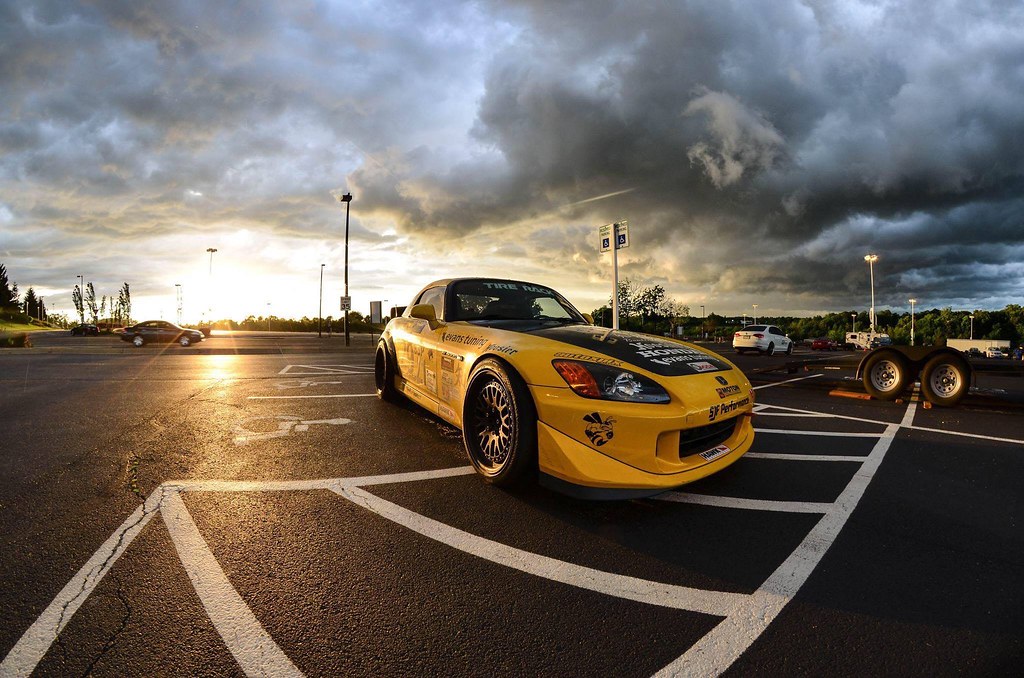
Incredible "after the storm" sunset photo of Bumblestook
Photo credit: Alejandro Aviles
Hopeful that day 2 would yield faster times, we were faced with a big challenge of trying to get tire temps up as the ambient temperatures had dropped into the 40s with winds strong enough to blow cones around on their own. This was especially bad news for Tamra who would have to run 1st heat (8am) and despite doing some burn outs, the grip just wasn't there and she was unable to find more time leaving the positions where they were on day 1. Due to various timing delays and our group running last, the temps had risen a bit by the time we ran. I did a safe first left side run just to get a clean one in the books and then tried for a faster run dropping another 1.5 seconds. I was unable to improve on my right side runs from the day before though. I was sitting in the lead by 1.7 seconds on the class but Hez would now run and he would be going out with a warm tire advantage running just 10 minutes from when I finished my runs. His first runs showed no improvement on the left side and on the right side, he needed a clean run but red lit his first run with a 0.491 reaction time. On the now fully warmed tires, in his final runs he was able to find another 0.1 seconds on the left side course but was still trailing me on the right. All he needed was a good clean run and he did by dialing it back a little and playing safe. Looking at the times I was faster than him on the right by about half a second and he was faster than me on the left by about half a second. The result...he was able to just bump me for the win with a 0.038 second margin. This was the smallest margin class win for the weekend. Tamra got to the 2nd round in the Ladies challenge before she got eliminated by a red light on the right side. Both Hez and I got into the Super Challenge but were both eliminated in round 1.

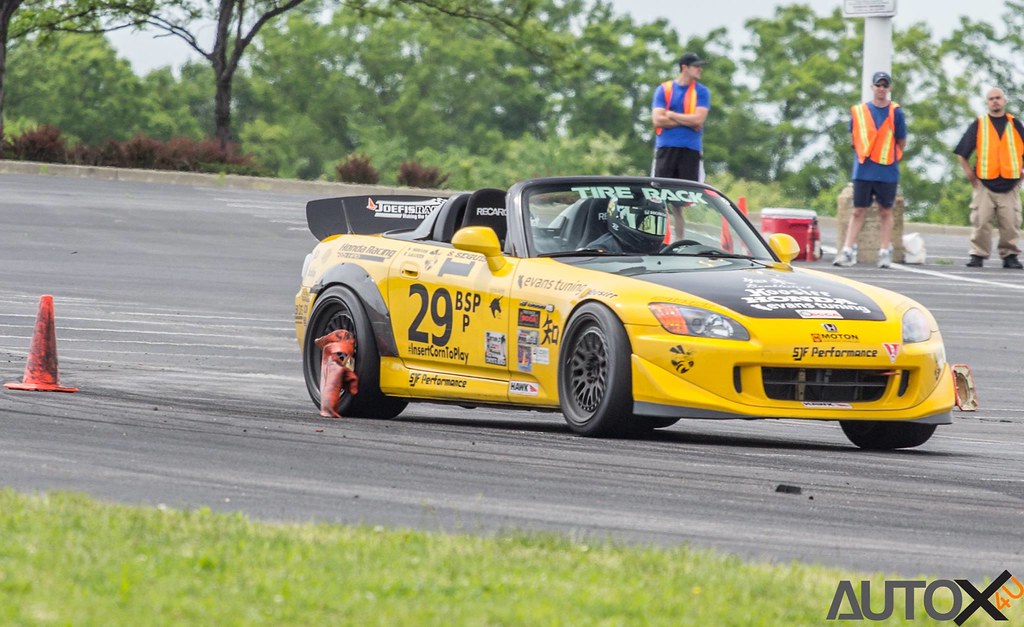
Cone murderer - DC ProSolo 2016
Photo credit: Perry Aidelbaum (autox4u.com)
It was a well deserved first ProSolo class win for Hez and more importantly, the win secured two tires from Hoosier, some lunch money from Honda for Hez and a voucher from Hawk that we'll use to get more brake pads for Bumblestook. Good weekend all around with all drivers securing trophies and happy we were able to defend Bumblestook's win from the last DC ProSolo in 2014. Hez and I still need to work on getting faster. Tamra showing us why she's the 2015 CSPL National Champion by skirting both of us despite running in less ideal conditions.

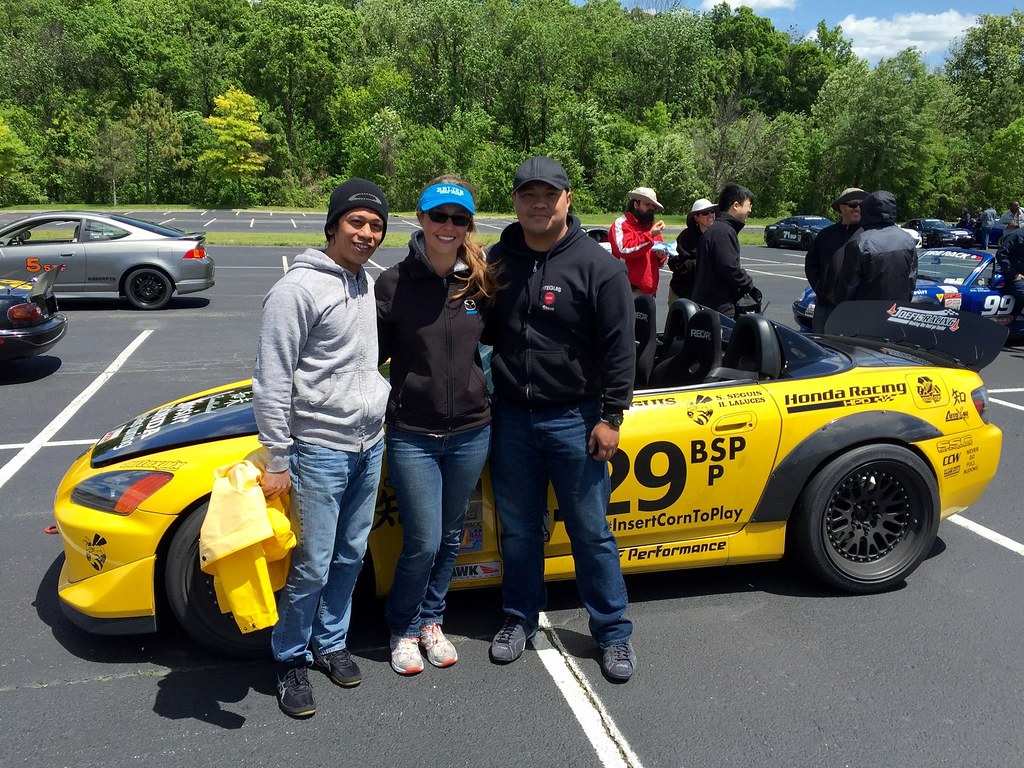
Team Bumblestook for the DC ProSolo 2016

Bumblestook BSP Fastest Runs - DC ProSolo 2016

Tamra's Fast Runs in L1 - DC ProSolo 2016

Although Bumblestook survived the event, we did encounter some engine misfires/sputtering during the challenge rounds. At first we though it was bad/low fuel and thankfully James Dunham did us a soild by rushing to the gas station to pick up more fuel for us. That didn't seem to specifically cure the problem. This was showing up as a P0373 CEL code in the Haltech ECU. I'll need to get in touch with Evans Tuning to see what they might think is causing it. It was intermittent and I'm now suspecting it might even be caused by a loose ground to the battery. After we got back to storage, when I was taking the battery out, I found I was able to pull the terminal off without loosening the bolt (that was already so tight it was hard to untighten). I'll address that as a first solution since electrical gremlins are best solved by fixing the obvious issues first.

Again, I want to thank all those who have helped through the years build and maintain Bumblestook into the glorious machine she is today. Big thanks to Evans Tuning, SJF Performance, Karcepts, ANZE Suspension, Josefis Racing, Hoosier, Hawk Peformance and Honda. We're into year 3 of racing Bumblestook in her current full BSP trim and we've only had to do very minor maintenance. I'd say the reliability has been very good for a car where every moment we take her out she's pushed to her limit. Out next National event will be the Toledo ProSolo in a month. Looking forward to taking this battle on concrete.

Sunday, April 24, 2016

Validating Bumblestook's Pace

We had another perfect weather autocross day today with the NNJR SCCA. It's the 2nd points event of the season for the club and the 2nd time the entrees were maxed out at 175 drivers with 44 drivers in the Pro index class. We were planning on running the tires we ran at Nationals at the DC ProSolo in a few weeks but with BSP having enough drivers to make a class, we have an opportunity to win some tires from Hoosier so I picked up a set of fresh A7s to maximize our chances. Unfortunately, A7s aren't fast when fresh so we took the opportunity with the great weather to scrub them in now.

Ready to scrub in fresh tires - NNJR SCCA - 4-24-2016
Photo by: Andrew Vassallo
First runs were definitely a bit sketchy and slippery on the new tires but after about 2 runs each, they started to come to life and times dropped. Hez and I were trading fast times but as usual Hez zoned in and really picked up the pace. I know this was just a local event which for most of us means practice but with Wilmington ProSolo and DC ProSolo happening next month, the event was packed with top caliber drivers including several national champions. It would be the perfect opportunity to gauge our driving and Bumblestook's speed. 

NNJR SCCA - 4-24-2016
Photo by: Andrew Vassallo
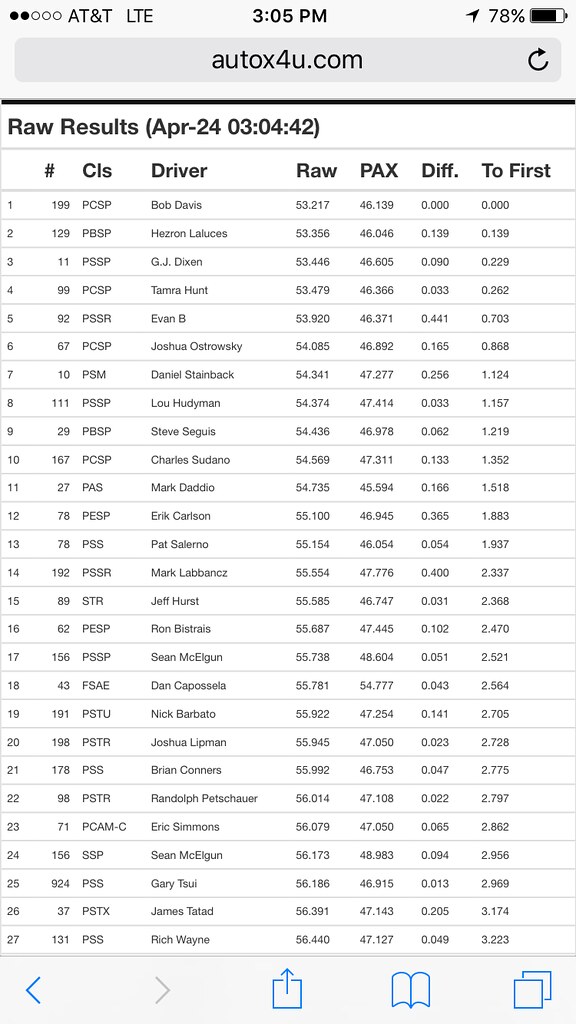
We got 6 runs each in total and it was a heated battle. No one was sandbagging and everyone was driving to their full potential. In the end, Hez was able to bring Bumblestook all the way to 2nd in PAX and RAW overall beaten only in PAX by Mark Daddio in his AS Corvette and RAW timed marginally by Bob Davis in his CSP miata. While I was able to find more time, I was still the usual one second off Hez's time so I ended up 9th RAW and 13th in PAX. It's not a horrible finish but I definitely need to continue working on closing that gap. 

Top PAX results

Top RAW time results
Watching the video of our fastest clean runs, it's clear that additional time could've been extracted in Bumblestook with a perfect line which is a bit mindblowing considering the pace she already has. We weren't even running ethanol yet. This is very encouraging and hopefully Bumblestook will be at the top step of the podium in the upcoming big events. 

NNJR SCCA - Meadowlands, NJ - 4/24/2016

Thursday, April 21, 2016

Building a BSP S2000 on a Budget

Introduction

Many people shy away from a Street Prepared class build because they are "expensive" and "unreliable" and while it's true that you can toss a pretty penny into a BSP build, it doesn't really have to be this way. I've certainly spent more than I care to sum up and disclose in Bumblestook but knowing what I know now and comparing it to the similarities in my STR class build of Lupa (my other S2000), I thought I'd take a crack at putting together a list of things you'd need to do to make a fairly competitive budget BSP S2000. I'd say this kind of build is probably 90% of the way to a full BSP build and is a good way to have lots of the BSP fun at just a small cost above a fully prepped STR build.

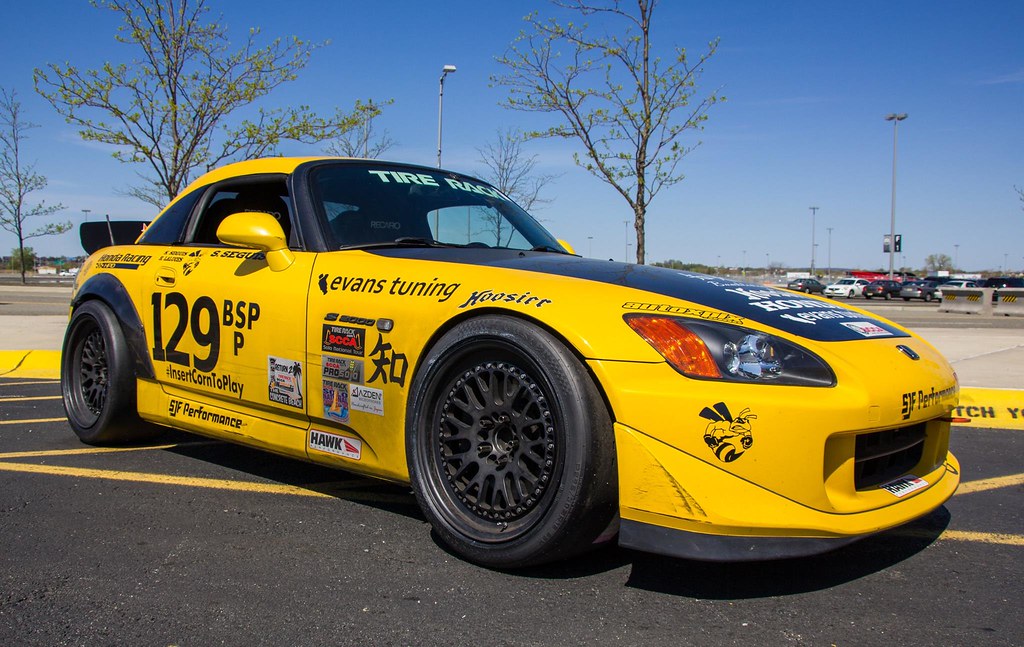
Bumblestook - Fully Prepped SCCA B-Street Prepared S2000

Chassis Selection

You have two ways to go here. You can either go with an AP1 (2000-2003) or AP2V1 (2004-2005) S2000. As I go on you'll see why I'm proposing going this route but mostly this is to keep costs down. In stock trim, the AP1 comes with a 2.0L engine (F20C) that revs to 9000rpms and has taller gearing, whereas the AP2 comes with a 2.2L engine (F22C) that revs to 8200rpm. The AP1 is regarded as being much more twitchy due to a rear suspension geometry that creates dynamic toe out under compression. This is generally considered a negative characteristic but Bumblestook is an AP1 (2002) and I've tuned my setup to take advantage of this weakness so personally I think either chassis will do fine provided you set up for it.

The AP1 also has the advantage of having the faster steering rack similar in ratio to what you find the S2000 CR. Both the AP1 and AP2V1 have fully mechanical throttle bodies and the drive trains are interchangeable between the two generations making it suitable for taking advantage of the Street Prepared update/backdate rules. AP2s also have a bit of reinforcement in the front upper control arms adding to their reliability. If you want to keep costs really down, try to find one with a salvage title that wasn't actually in an accident. Many S2000s get their soft tops cut open when thieves steal their seats and many car insurance companies total S2000s as a result of this relatively "minor" damage. The other reason you might want a salvage titled car aside from being cheaper is because you're going to be cutting and pulling fenders to fit some fat wheels/tires anyway.

Prices:

$8000-$15000 (depending on chassis and condition)

Engine/Transmission Swap

This is where it gets interesting. No matter what chassis you choose, you want an AP2 engine (F22C) and an AP1 transmission. This is because the greater displacement of the F22C produces better midrange torque than the F20C but doesn't rev as high so the taller gearing of an AP1 transmission helps increase the top speed at 2nd gear. After a tune and bumping the rev limiter up to the 8600-8800 range, you'll be able to achieve a top speed of around 66-68 mph in 2nd gear which is very useful for some of the higher speed national level courses.
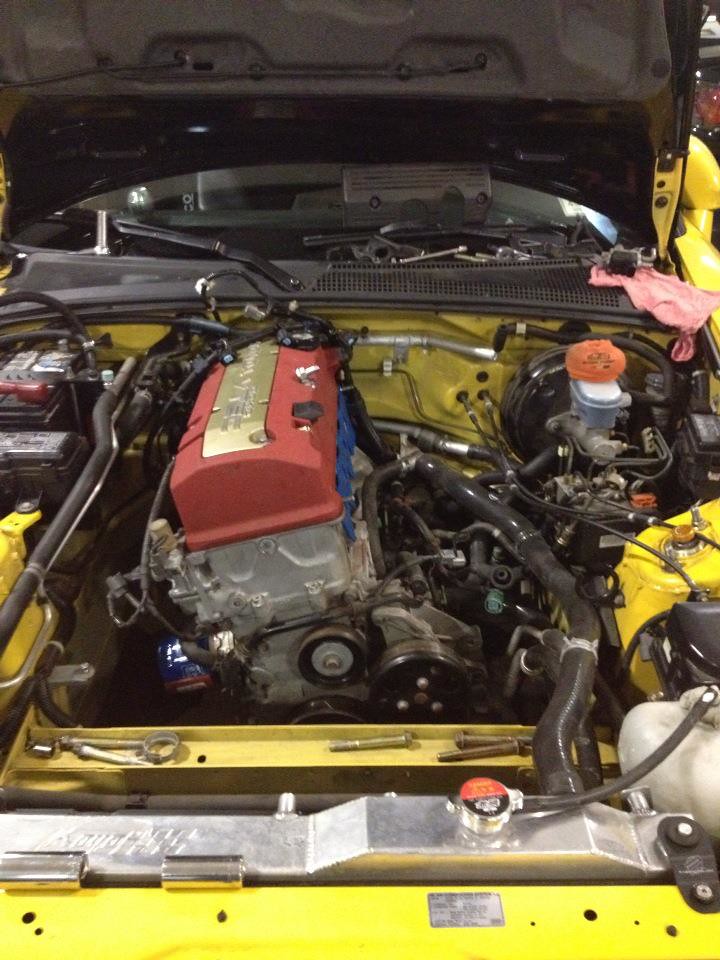
F22C in AP1 chassis (minus the intake manifold)
If you bought an AP1, you'd have to source an F22C and swap it in, if you bought an AP2, you'd have to source an AP1 transmission and swap that in. The two engines and transmissions are fully bolt on replacements, even the wiring is the same. No special adapters are needed. It's easier to swap a transmission than a motor so there are advantages to starting with an AP2 but you're going to want to swap in an AP1 steering rack if you do start off with an AP2 so figure out which way you prefer to go.

I'd also personally recommend getting upgraded motor and transmission mounts that use 75A polyurethane bushings. I use the Innovative 75a mount kit on Bumblestook. Also, depending on your budget, if you're already going to swap the transmission or engine, now would be a good time to change the clutch if it's due for replacement. If you replace the clutch, I highly recommend an AP1 flywheel, OEM clutch with ACT HD pressure plate. It provides a very reliable setup with great pedal feel that can handle quite a bit more power and if you started off with an AP2, a significantly lighter flywheel (14lbs vs 22lbs).

Prices:

Used AP1 transmission (If starting with AP2) - $350-600
Used F22C (If starting with AP1) - $2500
Used AP1 steering rack (If starting with AP2) - $200
Innovative 75A motor/transmission mounts - $350
Clutch, flywheel and pressure plate (Optional if due for replacement anyway) - Around $800-$1000

Differential

The stock Torsen differential is great but personally I find that a 1.5 way clutch type LSD works a bit more predictably and is better for a Street Prepared application. As a bare minimum you could just put in a 1.5 way LSD (I use the ATS Spec III, others use OSGiken, your choice really) into the existing diff housing on the car. The differential is where most S2000s have had failures so instead, I'd recommend getting a used diff housing and putting the 1.5 way LSD in that and swapping the entire pumpkin so you have a spare. One important consideration here is that the flange going to the diff and the flange on the output shaft of the transmission (well driveshaft really) is different on an AP1 and AP2.
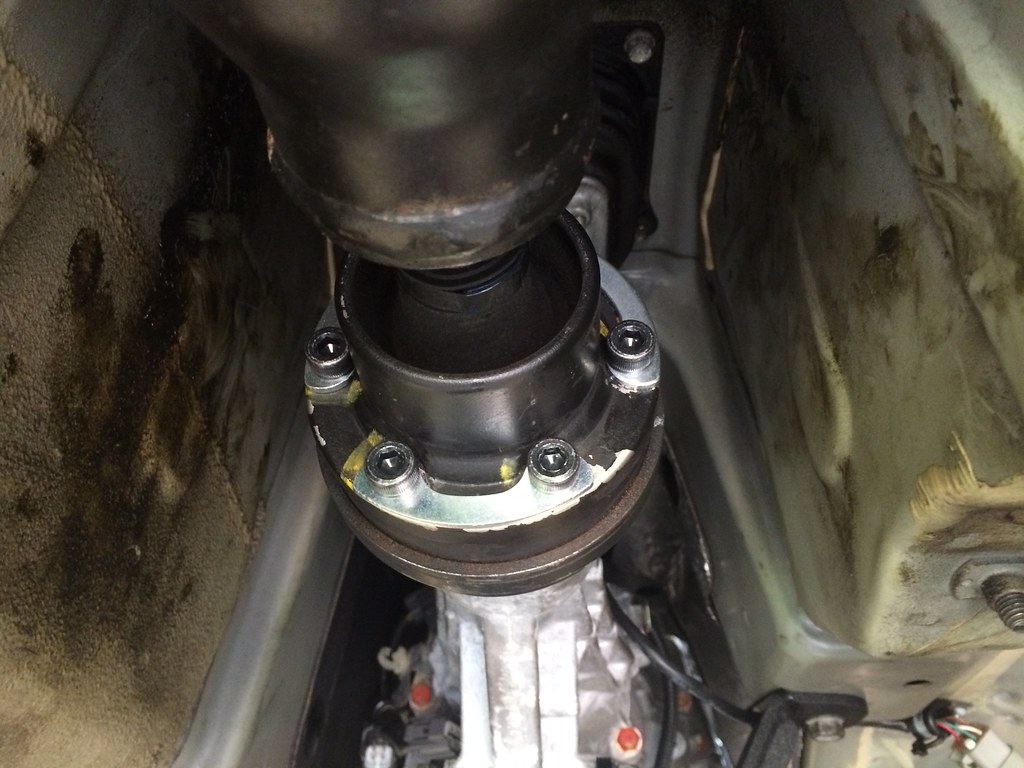
AP1 Transmisson to AP2 differential using 8mm AP1 bolts
AP1s have smaller holes and use 8mm bolts where as AP2s use 10mm bolts that go into proportionally larger holes. Street Prepared does not allow you to change flanges on either the transmission or the differential side using the update/backdate rule. This is fine, just use the 8mm AP1 bolts (I suggest fresh ones since they strip easily), use locktite and torque to AP2 spec. It'll hold up just fine.

Prices:
1.5 way LSD - $1800
1.5 way LSD with used diff housing and seals (recommended) - $2500

Power Mods

A full BSP S2000 build will use some kind of larger intake manifold and throttle body to get maximum power but the F22C is already so well tuned from the factory that this extra cost really only nets you about an additional 10 hp and 10 ft-lb of torque across the entire power band (assuming 93 octane pump gas here). This is nice to have but I think it's not an absolute must so the standard STR class power mods are all you need here. Add a K&N FIPK instake for better breathing. Get a header both to save weight and to make power. The cheapest good option here is the PLM header which is really a clone of the J's racing manifold.

PLM header (top), stock (below)
Get an OEM exhaust donut gasket if it doesn't come with one so you don't get exhaust leaks. Add a 70mm test pipe and a 70mm single side exhaust for both power and weight savings. Get an AEM EMS Series 2 or Haltech Pro Plugin standalone ECU then get a tune. I suggest talking with your tuner to get their recommendations/preferences here. I recommend Evans Tuning if you're in the North East and are tuning on either the AEM or Haltech standalone units.

Prices: 

K&N FIPK - $300
PLM Header - $350
70mm Test Pipe - $70
70mm Single Side exhaust - $800
AEM or Haltech ECU - $1300-$1400
Tune - $600

Suspension

Similar to a STR build, I'd recommend getting some kind of dual adjustable reputable shocks from Moton, MCS, Penske or JRZ and pair it with some fairly stiff springs. I run 1000lb front and 900lb rear springs on Bumblestook. Depending on your car setup, you may want to opt for a different spring combination. Add front and rear sway bars. I highly recommend the Karcepts front and rear sway bars. You'll want to add something to add more front camber. Similar to many STR setups, you can run a Hardrace offset camber joint (don't get the roll center adjusting ones, just the offset one).
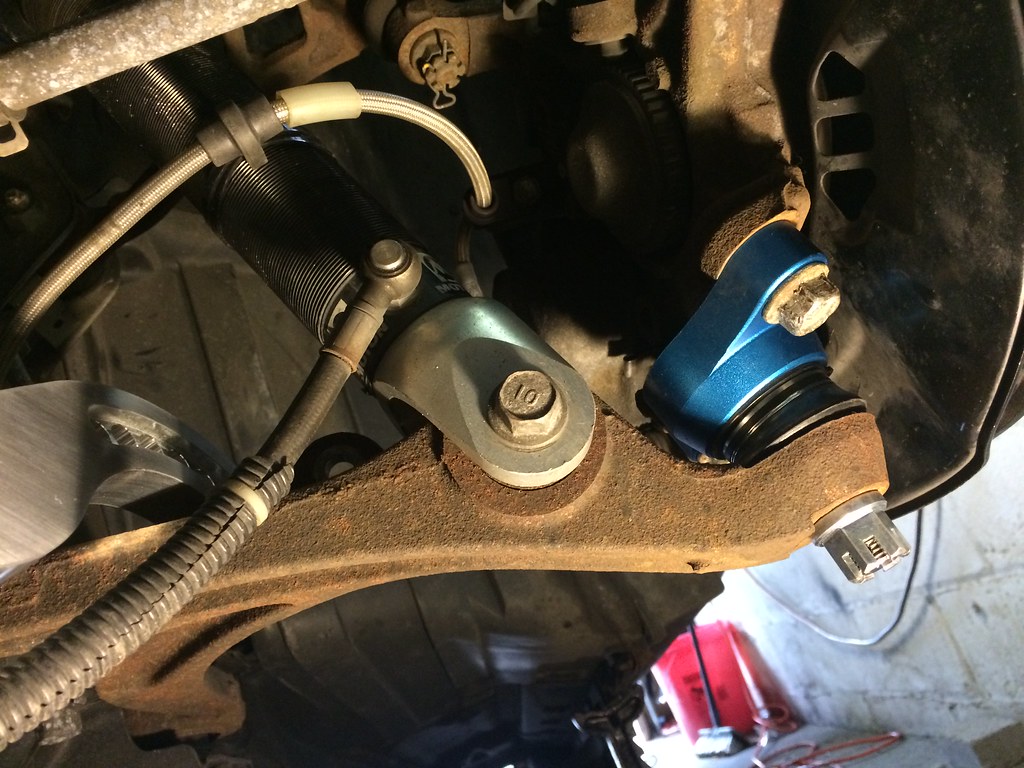
Hardrace offset camber ball joint (blue)
If you bought an older S2000, make sure you can actually move the caster bolt on the lower control arm. These are often found seized up on many ill maintained S2000s and you'll have to cut it off and replace the caster bushing (a.k.a the front compliance bushing). There is no OEM replacement bushing alone, you have to buy the entire lower control arm (easier but more expensive way) or you can just get replacement harder rubber ones made by Mugen from Kingmotorsports.

Prices:

Shocks and springs - $2500-$3000
Karcepts front and rear sway bars - $1000
Hardrace Camber Joint - $300
Mugen hard rubber front compliance bushings - $100

Wheels/Tires

Wheels and tires are unlimited in Street Prepared. Tire choice is easy, Hoosier A7, no question. For the rear you'll want to run a 315/30/18 and for the front, you'll want either a 285/30/18, 295/30/18 or 315/30/18. Obviously wheel size will vary depending on what tire you end up choosing. I run 18x11 front and 18x12 rear. The reality is that there aren't really any out of box wheel options out there for such a wide wheel on a S2000 since we run such high offsets so you're going to have to go custom. I use CCW, others have had good success with Forgeline (not to be confused with Forgestar!).
Fatty wheels/tires
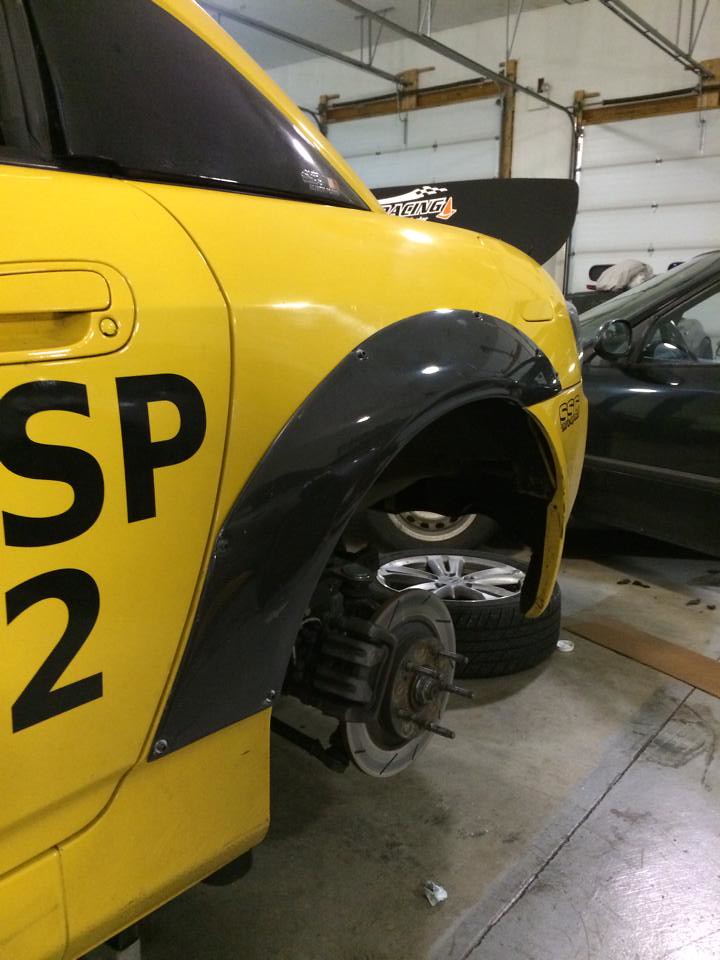
To fit these massive wheels and tires you will have to pull (I mean aggressively pull) your front fenders and cut your rear fenders and add some overfenders so it looks clean. This is the part that makes most people hesitate about moving to BSP because you can't really go back. This is why I recommended trying to find a salvage title vehicle already to save some cash since you're already going to hack up the rear quarter panel. While it's true that you can't really reverse this process, there are MANY S2000 owners that love the wider rear look so I really don't think it necessarily takes off that much value from the car. If you really care about holding some value then have the rear quarter panel cut properly, repaint that area so it doesn't rust and do a clean job with the overfenders. Shine rear over fenders (ASM replicas) are cheap and easy to add on.If you get carbon fiber ones you don't even have to worry about painting it as long as you like the two tone look.
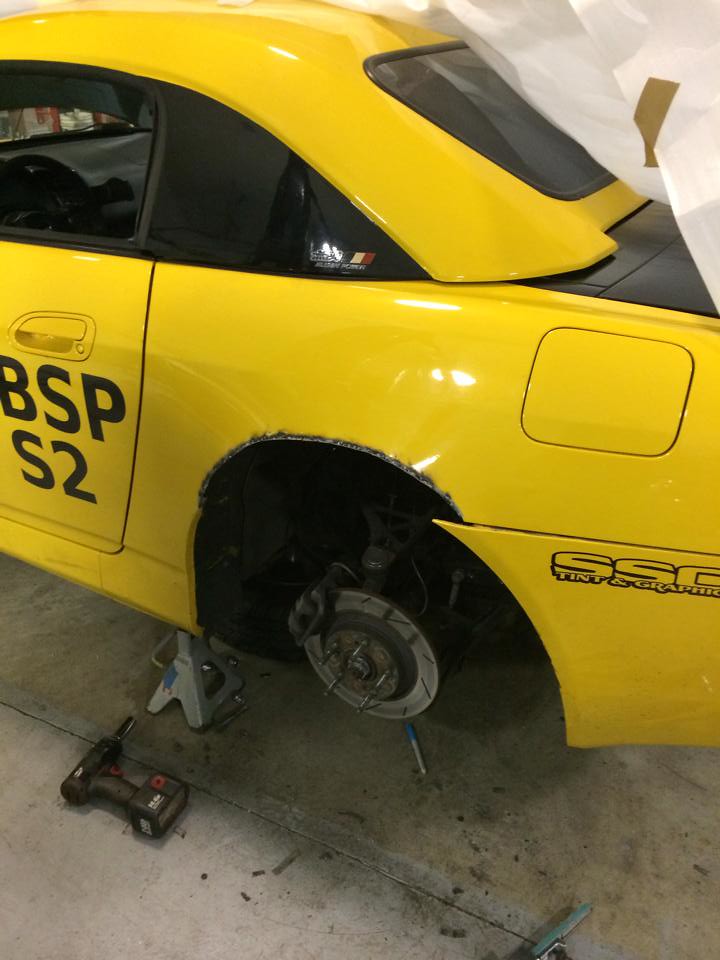
Rear quarter panels cut
Overfenders bolted on 
Prices:

Wheels - $2000-$3000
Tires - $1500-$1600 (your first set)
Shine rear over fenders - $200 (FRP), $275 (Carbon fiber)

Brakes

Stock brakes are fine but I'd swap out the brake compound with something a bit more aggressive since you've got so much more grip now. I use Hawk HP+ pads. Optionally while you're at it, go put in some stainless braided lines for performance and safety.

Prices: 

Hawk HP+ brake pads: $120
Stainless braided lines $100

Interior

You really don't need to do anything here but I'd recommend replacing at least the driver seat with a full on bucket racing seat and rails. BSP cars on Hoosiers generate lots of lateral grip and change directions like nobody's business so you'll want something to keep you in place. I use Recaro Pole Position seats with Ballade Sports rails. You can certainly find cheaper seats and rails. Find whatever works for you.

Prices:

Bucket Seat: $300-800
Rails: $100-300

Conclusion

First off, all the prices I've listed above are rough estimates. Unless I mention otherwise they are for new parts so money can be saved by buying used where appropriate. Also, with the engine or transmission swap, if you start off with a good engine and transmission you can also sell the old engine or transmission to recoup some of the cost after you do the swap. I'm also not factoring any labor costs in any of these. If you're not mechanically skilled enough to do these yourself you will have to factor in costs of paying someone else to do it (or have really good friends that will help you do it).

More importantly, I wanted to note that almost everything I've listed above is something you'd do to prep a STR S2000. The major differences are the transmission and steering rack swap (assuming AP2 starting point), cutting/pulling fenders, and adding wide wheels and tires. Once you've committed to widening the car, I'd say with the stuff I've listed above, a budget BSP S2000 build is only about $5000 more than a STR build. However, if you have a pristine S2000 in STR trim, I bet you could sell that STR S2000 for good money, buy a less perfect chassis S2000 and build the budget BSP S2000 for the same price.

Frequently Asked Questions


How much more would I have to do to be a fully prepped BSP S2000 after doing this?


If you really want to go the distance and do a full build to the letter of the rules, you can also do the following:
  • Lightweight battery
  • Lightweight brakes
  • Remove the AC and radio
  • Remove the soft top and replace with a CR Tonneau cover to save weight
  • Change the passenger seat to save a bit more weight
  • Switch to a larger intake manifold and throttle body, add higher flowing injectors and fuel pump and retune to add about 10 hp and 10ft-lb of torque across the entire power band
  • You can also tune the car for E85 and make an additional 10hp and 10ft-lb of torque on top of the gains of a bigger intake manifold and throttle body
  • Add a front and rear spoiler
As you can see you're not really adding a ton of additional power so the return for the power mod investment is rather small so a lot of the mods are more for reducing weight.

You say you don't need all this stuff but you've got tons of stuff on Bumblestook, why?


To be honest, the answer is just "because I can". Mostly it was because at the time I moved to BSP, there were less than a handful of us building for this class and there wasn't a lot of data so lots of money was spent on trial and error and R&D. For the most part, very few things actually made a difference but I had already spent the money so the mods are staying on the car. If I had known then what I know now, I could've easily saved a significant amount of time and money.

STR is so much fun, why would I bother moving to BSP?


As a S2000 owner, most of my S2000 racing buddies run in STR. It's popular with lots of competitors and is certainly a lot of fun. It's so much fun that my 2nd S2000 is prepped for STR. That being said, the main draw for STR is the sheer number of competitors and while I have fun driving a STR S2000, nothing is even remotely comparable to driving a BSP S2000. I race for the competition but this is a serious hobby I do because it's pure fun and Bumblestook in BSP trim gives me more "smiles per second" than anything else I care to drive. Once you've driven a BSP S2000, you simply can't go back. Watching people's disbelief in the ridiculous times you can set in one of these just takes fun and enjoyment to a whole new level. 

BSP S2000s break more easily than STR S2000s though. I'm afraid of that!


I'm going into year 4 of campaigning Bumblestook nationally. In those years I've only actually broken one thing, the differential. The other "failures" I've had were mechanical issues where bolts weren't tightened down properly. My STR friends have had similar failures so I don't really think that's a valid argument. Things can break when you go racing. BSP S2000s don't brake anymore than STR ones do.

Ok so I can maybe build a BSP S2000 for the price of a super clean STR S2000 and maybe I won't break any more frequently than STR, it's still more expensive because Hoosiers don't last long


Hoosier has vastly improved the longetivity of their tires. On good surfaces, you're able to get almost as many decently competitive runs out of A7s as you are from the top tier competition street tires. At the end of 2015, to "kill" my old 140 run tires, I had 4 drivers take my car out for almost 10 runs each and we were still able to set FTD (http://bumblestook.blogspot.com/2015/10/ending-season-on-high-note.html) and the tires still have life in them if I wanted to use them for local events today. Also, while we really don't have a "spec tire", almost everyone in street prepared runs Hoosiers making tire selection easy. The street tire guys are constantly testing and trying different new street tire compounds. Many of my STR friends have more sets of wheels and tires than I do for my BSP car.

Are S2000s even competitive in BSP?


Since the S2000 was added to BSP in 2012, a S2000 has won the national championship 3 of the 4 years so far. I'd say it can be capable especially with a good driver wheeling it.

Don't you have to tow a BSP car to every event? 


Having a trailer and towing a BSP car to events is definitely nice mostly so I don't have to change wheels when I get there but a build like this is fully streetable. In fact, my friend Dave Roberts from the Kentucky region drives his BSP S2000 to events all the time. There are a few options if you don't want to or can't tow. First, you can add a removable hitch from Chase Race and tow a tire trailer which is what Dave does. An even easier method is if you can find a codriver, have him/her bring the race wheels with them and you drive there on street tires and swap wheels on site. For street tires, I think Bridgestone RE-71Rs are a great and can easily double as a good rain competition tire instead of spending big money on Hoosier wets so you can kill two birds with one Stone (pun intended).

Final Thoughts


Street Prepared is a 50% builder, 50% driver class. If you enjoy building and tinkering with your car, BSP offers many allowances within the class rules to do fun modifications without having to have super deep pockets that you'd need if you were moving to a Prepared or Street Modified class. The cars are fun and when built right, no less reliable than their Street Touring counterparts and you are guaranteed to have a grin from ear to ear after each and every run. Don't be afraid, life's too short, build your BSP S2000 because you haven't quite autocrossed until you've driven one.
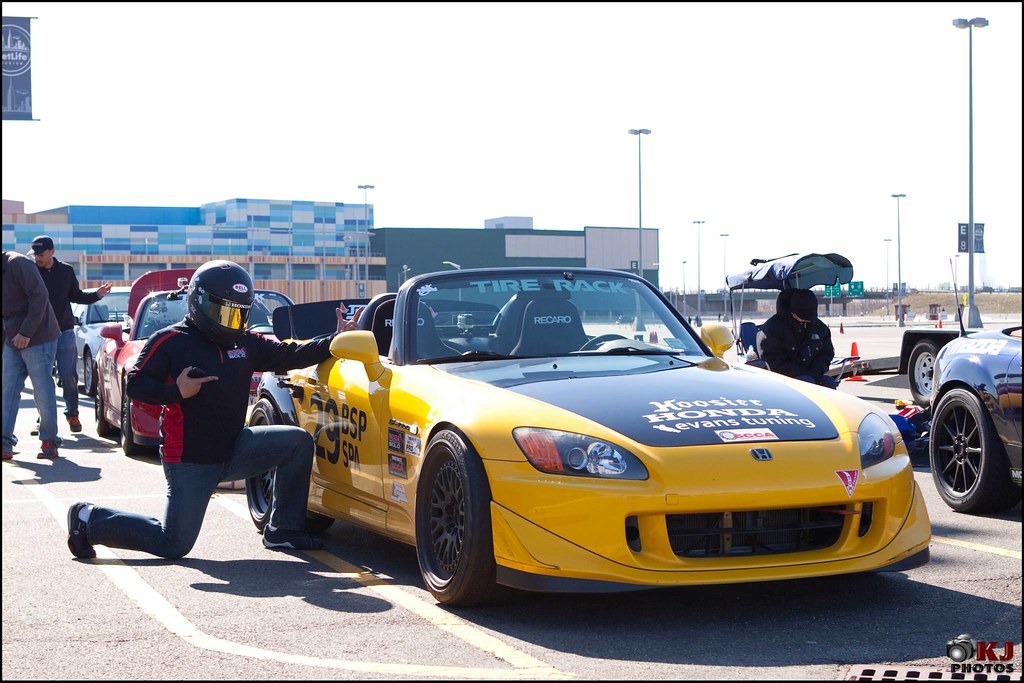
Enjoy your BSP S2000! Try not to giggle like a school girl
with all that new found grip and awesomeness.

Sunday, April 17, 2016

NNJR PCA - Taking the Top Spots

Today Hez and I took out Bumblestook for the first time this season. We had tons of OPR (other people's rubber) from Nationals all over the tires, the front brakes were brand new and needed to be bed in and I wanted to see how the new seat rails would hold up. This was effectively a good shake down event for her in preparation for the DC ProSolo in a month.

NNJR PCA - 4/17/2016
Photo Credit: Perry Aidelbaum (autox4u.com)
Getting back in the driver seat of Bumblestook was like putting on your favorite jeans. Everything just fits and works just right. On my first run, I went hard on the brakes everywhere both to get the brakes sorted and to help scrub off the OPR. That was a bit too effective as I got back to grid with some smoke coming off the front brakes. I presume this is just the residual oil burning off. After that run they were fine and biting extremely hard. I had almost forgotten how incredible she is to drive. She just works and does everything right! Her ability to change directions so quickly is kind of mind boggling after having not driven since the end of last year.

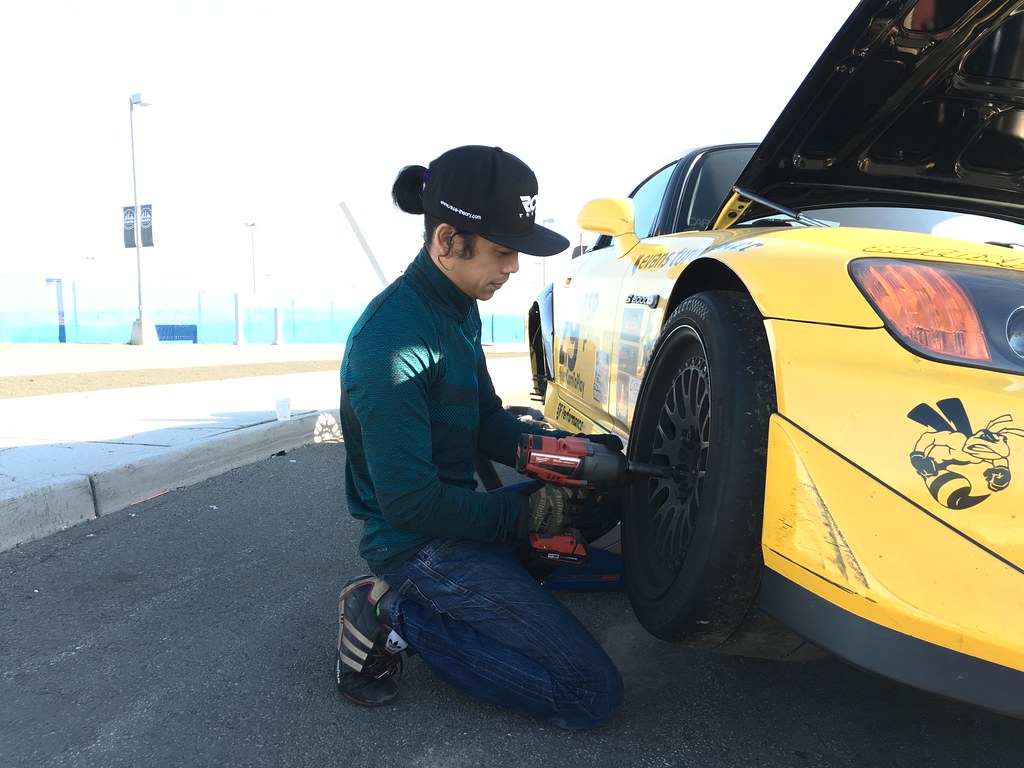
Hez putting on the freshly cleaned wheels and competition rubber
4/17/2016
By the end of our morning runs, all the OPR had been scrubbed off. She was feeling absolutely perfect and in the afternoon we were going to lay down our real times. I was trailing Hez by a second but on my first afternoon run I was able to find some time and close the gap a little, Hez responded by dropping his times as well and we kept doing this, pushing each other to drive harder, with every run. On my last run I was sitting about half a second from Hez time when he pulled flier and masterfully strung the corners together just right to find another 0.7 seconds to kill my time by a hefty 1.2 seconds and be the only car to break in the 49s. The official results have both of our fastest runs marked with a cone but we watched each others runs and saw no cones hit or workers running so I think that's a mistake. Either way, even our second fastest times were good enough to secure the top 2 raw times overall so the results don't change.

Getting ready to run - 4/17/2016
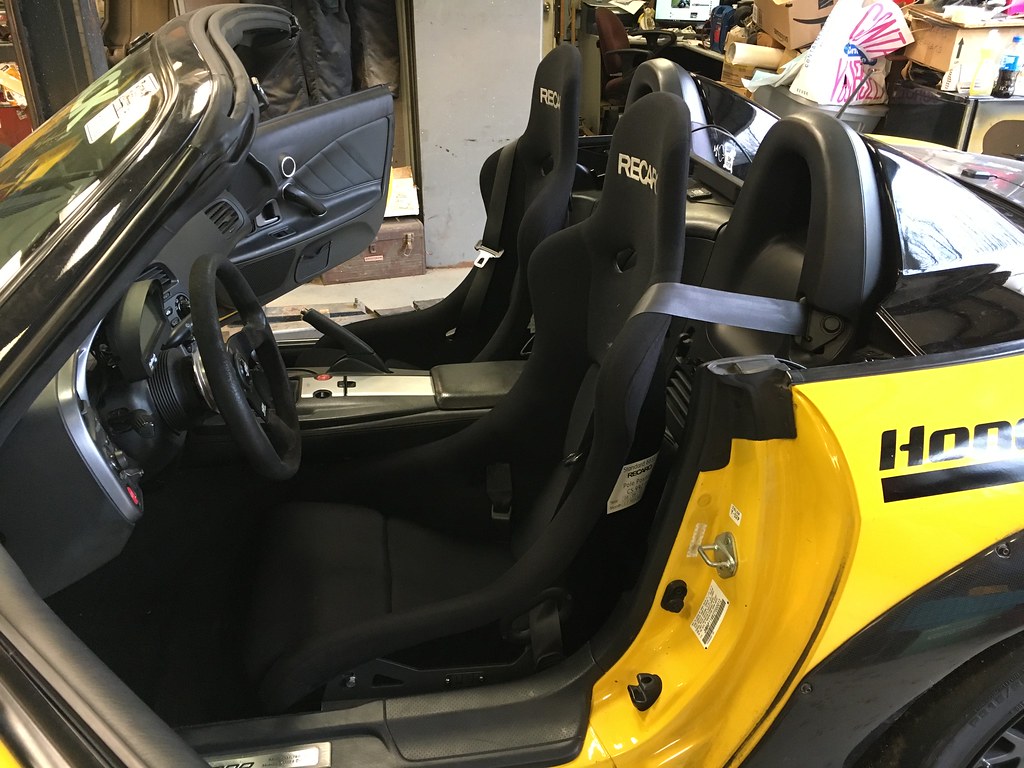
The seats now feel absolutely solid and despite having some doubts about having the seat fully upright bringing us closer to the wheel, both Hez and I felt that it actually gave us better control over the steering so we'll probably leave it like this for now. I had initially thought about reclining it a tad but this may be the faster setting. Overall this was a very successful event and most importantly we had loads of fun on the most perfect Spring day to be racing. All systems are go on Bumblestook and she's ready for battle. It feels so good to be back driving her. I know she's been anxious to show her why she's the #1 car in the team and boy did she deliver in spades today.

NNJR PCA - Meadowlands, NJ - 4/17/2016

Friday, March 18, 2016

Ready for 2016

Today I brought Bumblestook out for the first time since putting her away last season for hibernation. We identified some important fixes that needed to happen before the season started so I took a day off to bring her to SJF Performance to get these taken care of. The only issue I ran into after being parked for a few months was having to pump the clutch pedal a few times before the clutch would engage. This isn't uncommon for cars that sit for long periods of time but the clutch fluid is also a bit dirty so we'll probably flush it next time. It's working just fine for now.

Bumblestook sees sunlight for the first time in 2016 - 3/18/2016
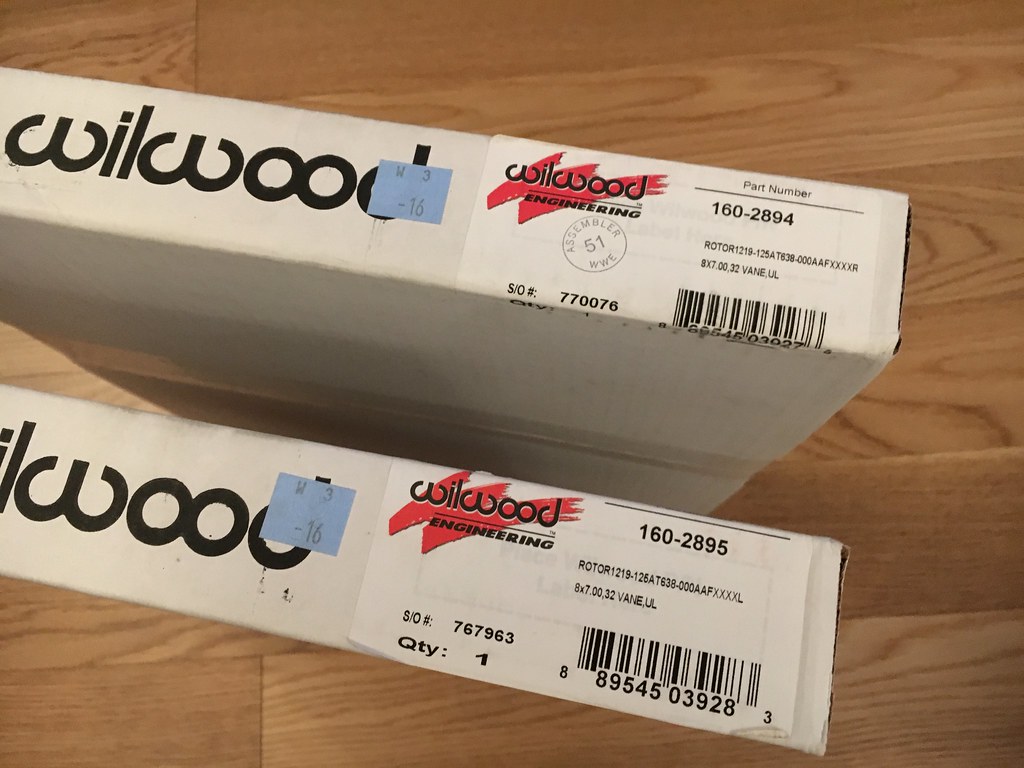
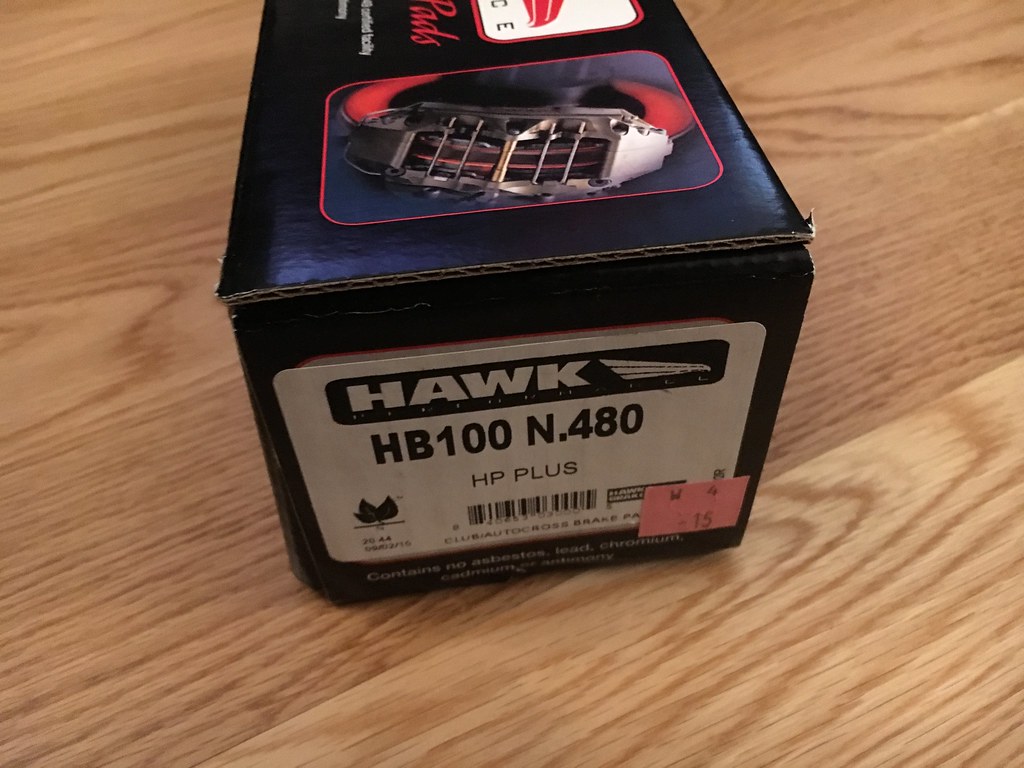
First and foremost, we had to address the brake issues. At the end of last season, we realized the noise coming from the front brakes was from the brakes being worn so over the winter I picked up a new pair of rotors and Hawk HP+ pads for the Wilwood kit. For future reference, the part numbers I need are Wilwood 160-2894 and 160-2895 and Hawk HB100 N.480 HP Plus pads.

New rotors arrived - 1/22/2016
New front pads arrived - 1/22/2016
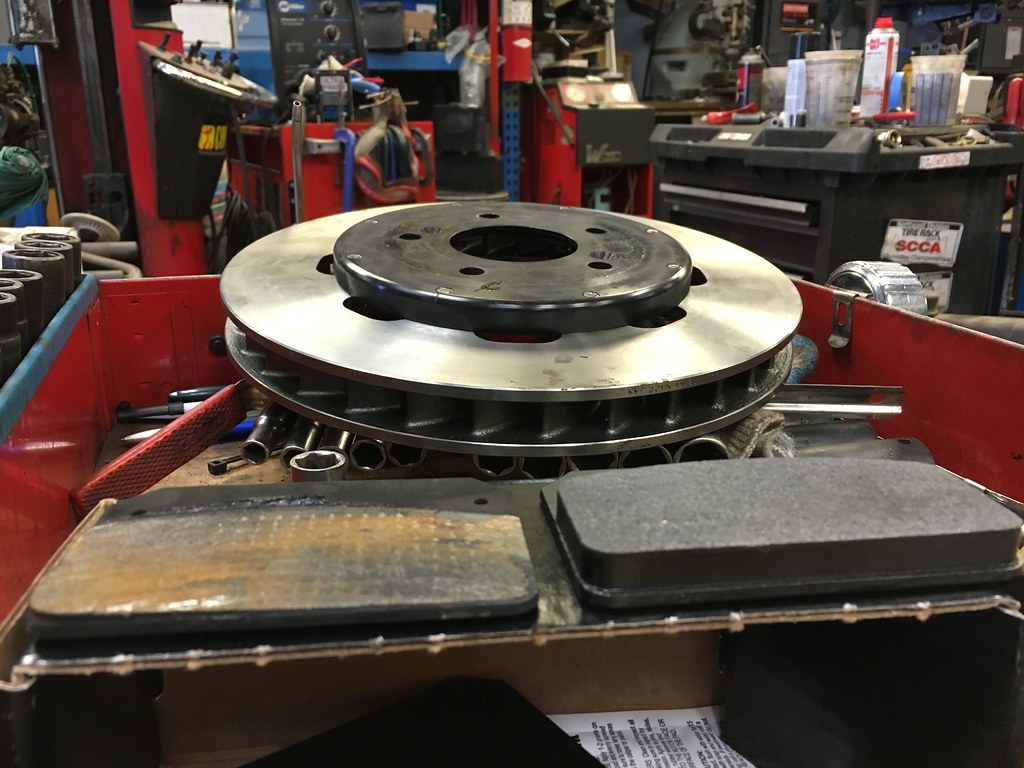
When SJF got the rotor off, we got a chance to look at the pads and they were more than worn, they were gone and I was braking using only the backing plate. Makes me wonder if Hez and I even had brakes during Nationals. I think going forward, since pads are pretty cheap (or free if you win Hawk contingency), we'll just replace them at the end of each season.

Old pad (left), new pad (right) - 3/18/2016
The old rotor hats were then transferred over to the new rotors. SJF made sure that all the threads were clean of any residual Loctite and applied new red Loctite and made sure each rotor bolt was torqued to 13 ft-lb.

New rotors and pads installed - 3/18/2016
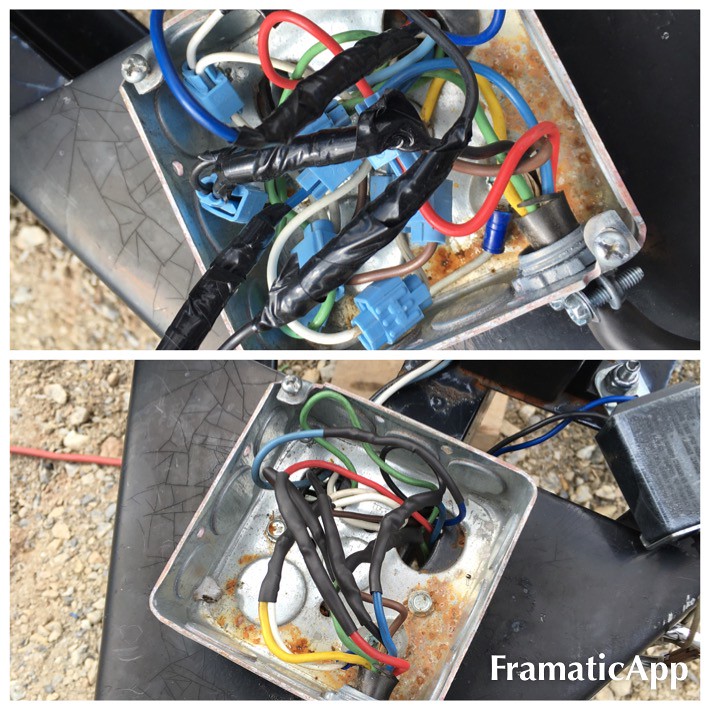
The brake fluid still looked clean (it's only been about 400 miles since my last brake flush) and the pedal feel was still good so we opted to skip flushing the brake fluid for now. I'll see how she feels at upcoming events and see if we should bleed it but I think we're good. While SJF was working on the brakes, I tried to be productive myself by fixing the wiring on the trailer that gave me so much grief on our way Nebraska last year. Gone are the quick connects. All the wires are now soldered and heat shrink wrapped for reliability and less clutter.

Trailer wiring cleaned up - 3/18/2016
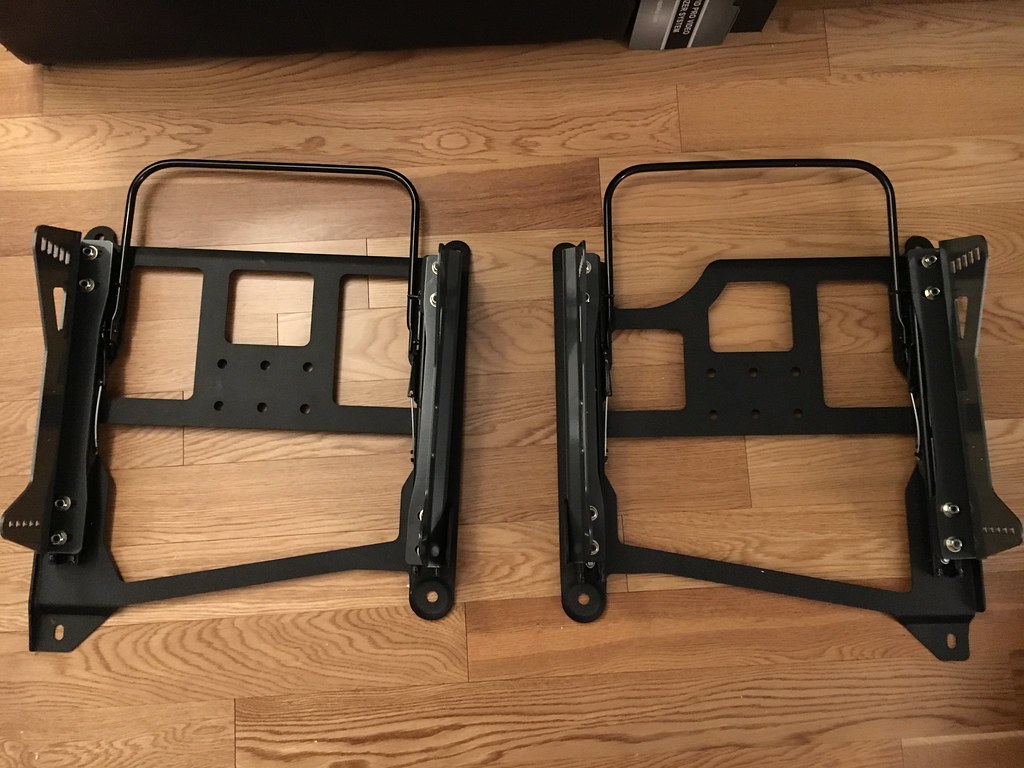
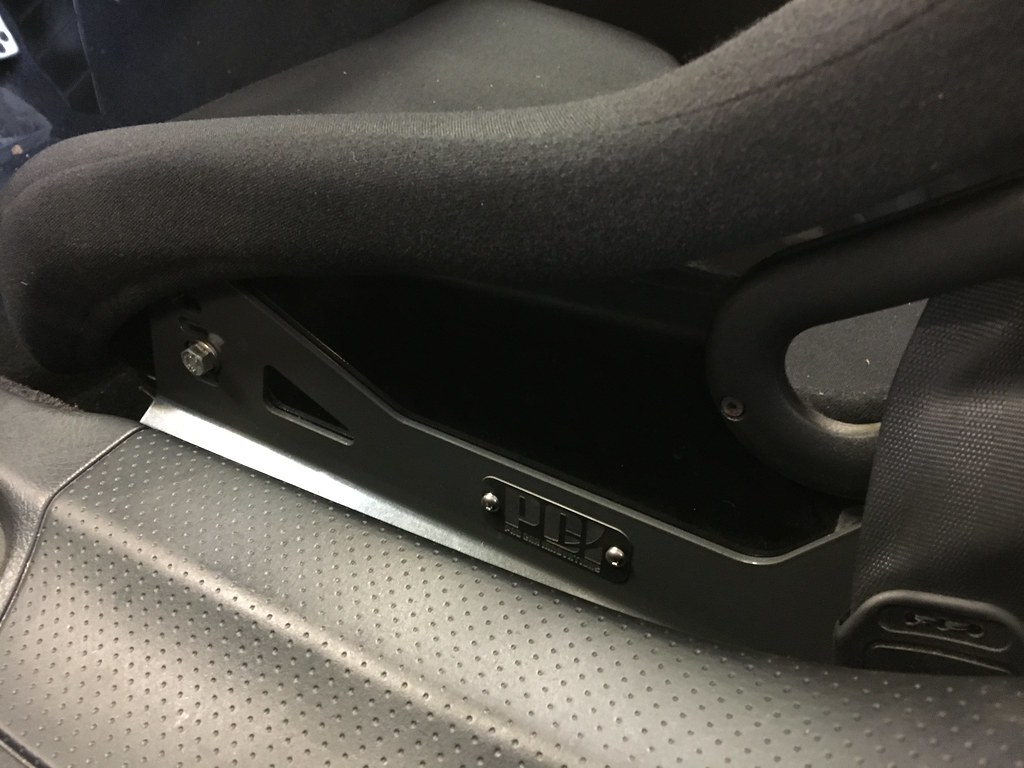
Next thing we tackled were the seats. The Buddy Club super low down rails have been on Bumblestook since 2012 and were starting to show some serious wear. I'd often find my seats to have a lot of play in them. This is not a good thing on a car that generates a lot of grip like a BSP car. Over the winter I ordered Ballade Sports seat rails instead. These are much better constructed and have a more solid feel to it.

Ballade Sport Seat Rails/Sliders - 1/22/2016
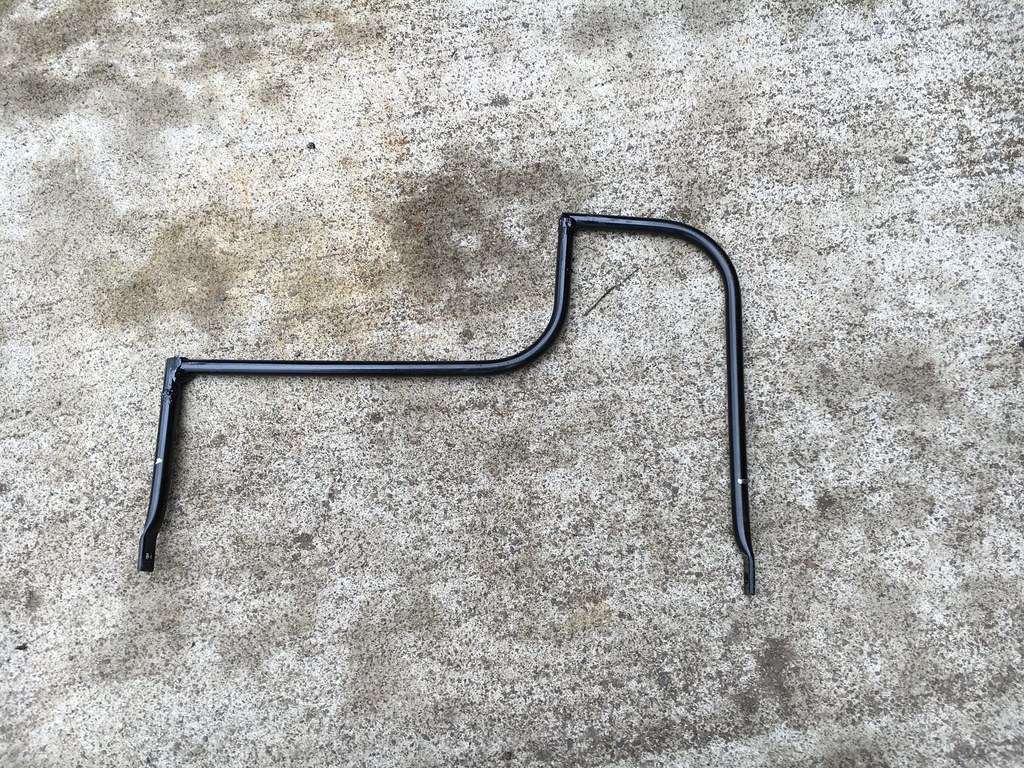
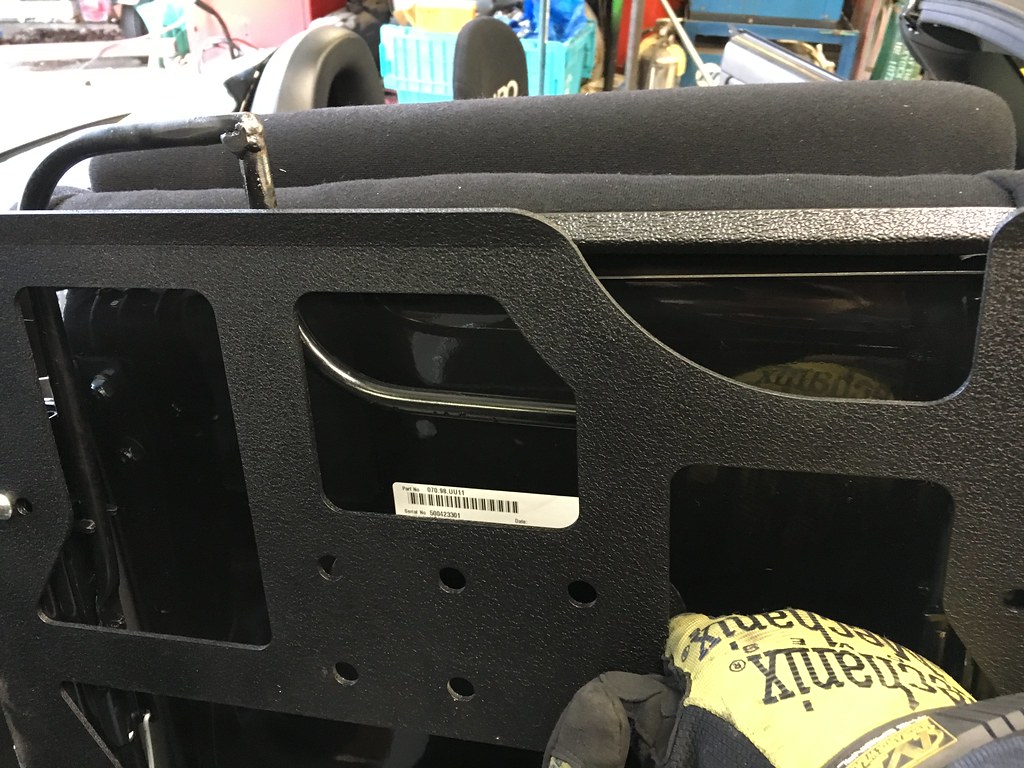
Installation was fairly straight forward for the driver side. All the holes lined up just right and at the widest setting, fit the Recaro Pole Position seats just fine. The passenger side was  a different story. They did create an opening in the seat base plate for the floor hump on the passenger side but as you can see in the image above the seat adjuster bar is still flat. This actually hits the floor hump making it impossible to install with the adjuster bar on. SJF quickly though up a solution of cutting the adjustment bar and rewelding it to go around the hump and it worked perfectly.

SJF modified passenger seat adjustment bar - 3/18/2016
SJF modified bar installed. Clears the hump cutout on the right - 3/18/2016
Seats reinstalled on the new rails - 3/18/2016
Side mounts - 3/18/2016
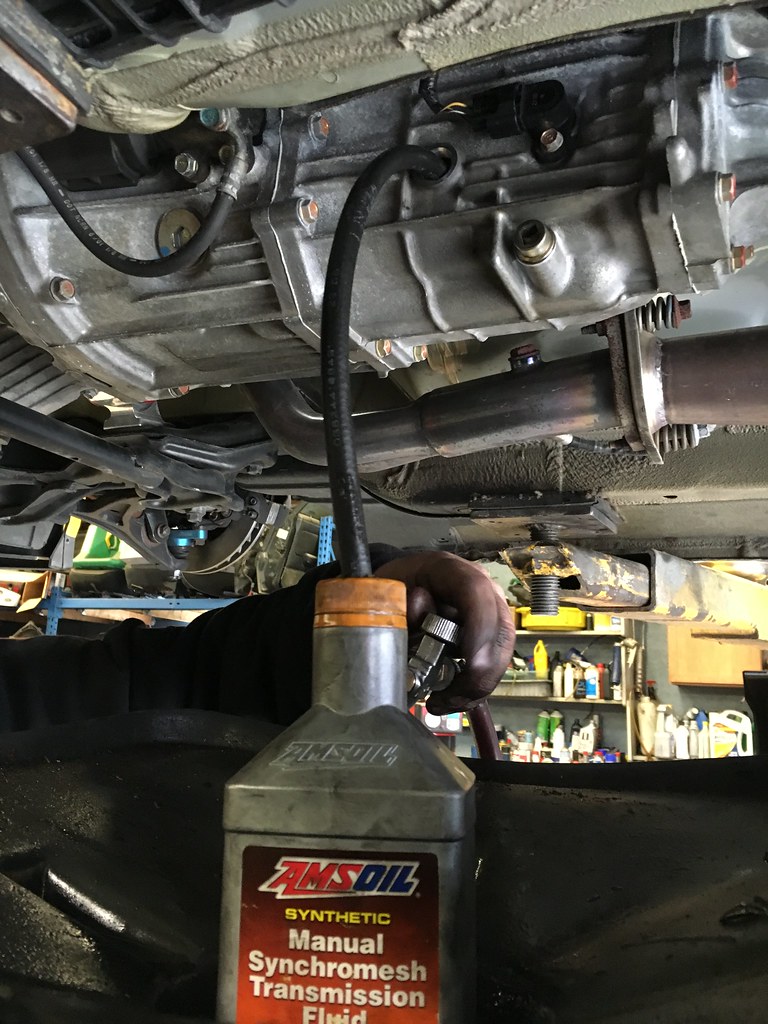
On the general maintenance front, we took off the cover for custom plenum Evans Tuning created for the ITBs to give them a close look and inspect for any bolts the might have started to back off. Everything looked good but I think my intake filter needs a good spray of fresh K&N oil as the filter started to look on the dry side. Engine, transmission and diff fluids were also flushed and replaced.

ITBs still looking healthy - 3/18/2016
Fresh fluids getting pumped in - 3/18/2016
Last but not least, we also took the snow tires off the Touareg and put back the good old summer tire/wheel setup. Bumblestook is now fully race ready for the 2016 race season.