I've decided to consolidate all my separate car specific blogs into a single umbrella so if you're interested in this content, please continue onto the new blog page at https://steguismotorsports.blogspot.com/
Thanks!
Steve
Thursday, September 19, 2019
Sunday, September 15, 2019
Tight Tight Tight...
Our final track day for the year is coming up in under two weeks so I wanted to get the last annoyance sorted on Bumblestook. While she's generally "good to go", I developed a weird suspension knocking sound on the right rear after the last track day that I initially thought was the diff but turned out to be wear on the rear upper control arm. The solid bushing wore just enough that at low speed (say below 5mph and especially when reversing) I would hear a noise coming from under the car. This wasn't detrimental to the handling but it was annoying me and frankly sounded embarrassing when moving around a parking a lot.
Bumblestook is always sorted and I hate leaving things unsettled so I ordered a brand new OEM rear upper control arm and had SJF take out the OEM rubber bushings so we could press in a fresh set of solid ones from Ballade Sport (same as the one I had on my arm). Luckily, Brad had an extra set lying around that he wasn't going to use so I bought it off him and so today I went to SJF Performance and he pressed the new bushing in and swapped it into the car.
I took it out for a test drive and everything is now tight again and no more annoying noises. Also, we finally put loctite on that driver side rear damper bolt that keeps backing out on its own. The passenger side, that already had loctite, hadn't moved at all but this one worked its way loose again since the last time I tightened it.
Just as an extra precaution, we also put it on the alignment rack to double check the alignment and as expected it's all still good. We didn't expect it would move but I don't like question marks so taking the extra time to double check is worth it in my book.
I spent the rest of the day driving her around to make sure everything was feeling good and she's perfect again ready for some fun times with S2K Takeover at NYST.
 |
| New rear upper control arm with rubber pushed taken out - 9/15/19 |
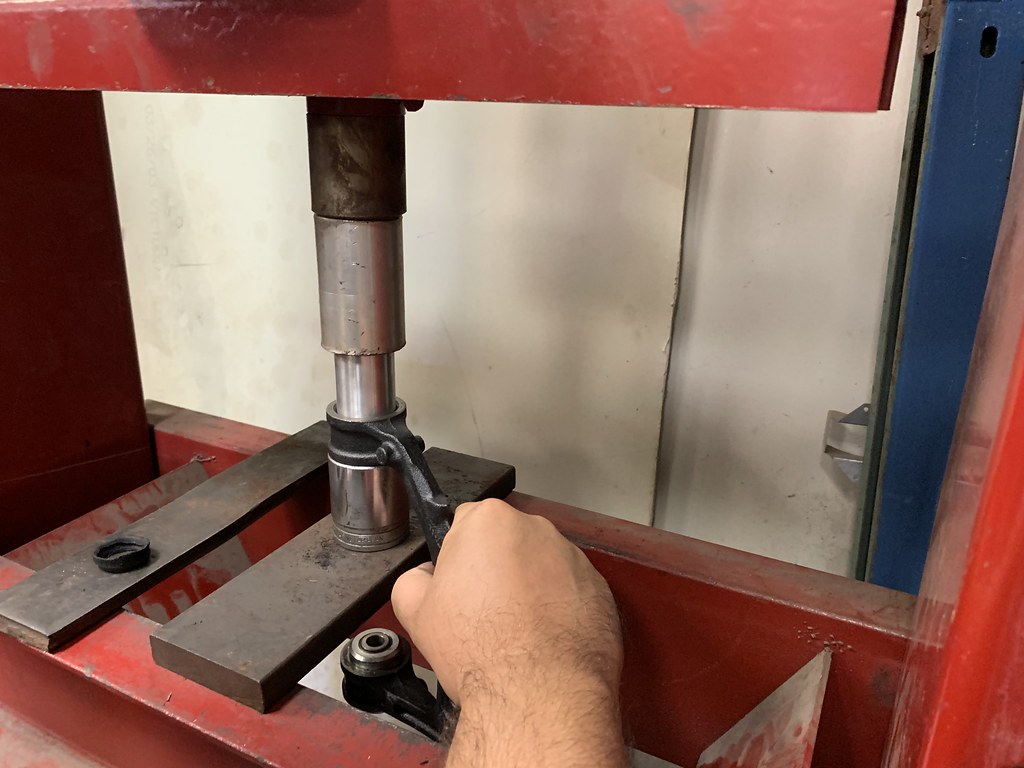 |
| New solid bushing getting pressed in - 9/15/2019 |
 |
| New upper rear arm installed - 9/15/2019 |
 |
| Mmm....fresh ball joint - 9/15/2019 |
 |
| Old upper control arm |
 |
| Loctite on driver rear damper bolt - 9/15/2019 |
 |
| Back on the alignment rack - 9/15/2019 |
Saturday, August 31, 2019
Hardtop Hoist
Since bringing Bumblestook back to road-legal status early last year I've been itching to drive her with the top off. Don't get me wrong, I love the Mugen hardtop. It's great for cold and hot days, track events and of course, it complements the looks really well but the S2000 is a roadster and on really nice days, nothing beats driving her with top off. The Mugen top itself isn't very heavy, it's only about 34lbs, but it's too big to safely remove and reinstall on the car by yourself. Now that I've moved to a garage with a higher ceiling, I finally got the opportunity to make this a reality by putting together a hardtop hoist so I can get the top off myself anytime I want.
I picked up the smallest electric hoist I could find. It was a simple 220lb lift capacity hoist from Amazon (https://www.amazon.com/gp/product/B07FPN64Z9/). I used two pieces of 6ft 90-degree angled aluminum from Home Depot to make sure it was going to be rigid enough to support the weight of the hoist and the hardtop. Since the hoist is mounted via square brackets, this worked out nicely since I can slide the hoist left or right to center it on the car as needed.
To support the front half of the hardtop, I used 5ft of 3/4" copper pipe wrapped in 3/4" foam insulation. Through it, I threaded 1/8" x 30ft of vinyl coated steel wire rope and attached it to the hook on the hoist. I obviously didn't use all the 30ft so I cut it to size once I was content with the height of the bar. The only problem left was to figure out what I was going to use to hook the back of the hardtop. I couldn't find anything in local stores last week so I only finished the hoist this week after buying a set of Rightline Gear car clips (https://www.amazon.com/gp/product/B007WR25KW). These are coated flat hooks that can hook over the rear of the hardtop without scratching it. I added some foam tape to further protect the hardtop from any marks.
To attach the hook to the rest of the rig, I got a set of 16ft 1-inch tie-down straps (https://www.amazon.com/gp/product/B07FM4WGW2). The ones I got had an extra flap to prevent the buckle from contacting the hardtop.
Finally, to connect the strap to the hoist hook, I used a pair of aluminum carabiners (https://www.amazon.com/gp/product/B07KTXLKWL) so it can easily be detached when I'm not using the hoist.
Now the moment of truth, with everything hooked up, I pressed the button to raise the top and it did so very easily. I held the top with my other hand to help guide to make sure it didn't swing or spin around but for the most part it actually didn't move much laterally and I had plenty of room, fully raised, to clear the Mugen wing in the rear.
I forgot how awesome it is to drive her through some mountain roads with the top off. You really get to use all your senses. The incredible sound of the engine and exhaust as it screams through all the revs, the feeling of the chassis as you bomb through the corners, the joy of looking up and seeing nothing but sky and getting blasted by the smell of fresh cool air. This is truly the essence of the S2000, what Shigeru Uehara called the "Open Sports Car Concept", and it is what really makes this car so special to drive each time. VTEC + Open Top + Open Road = grinning from ear to ear for miles on end.
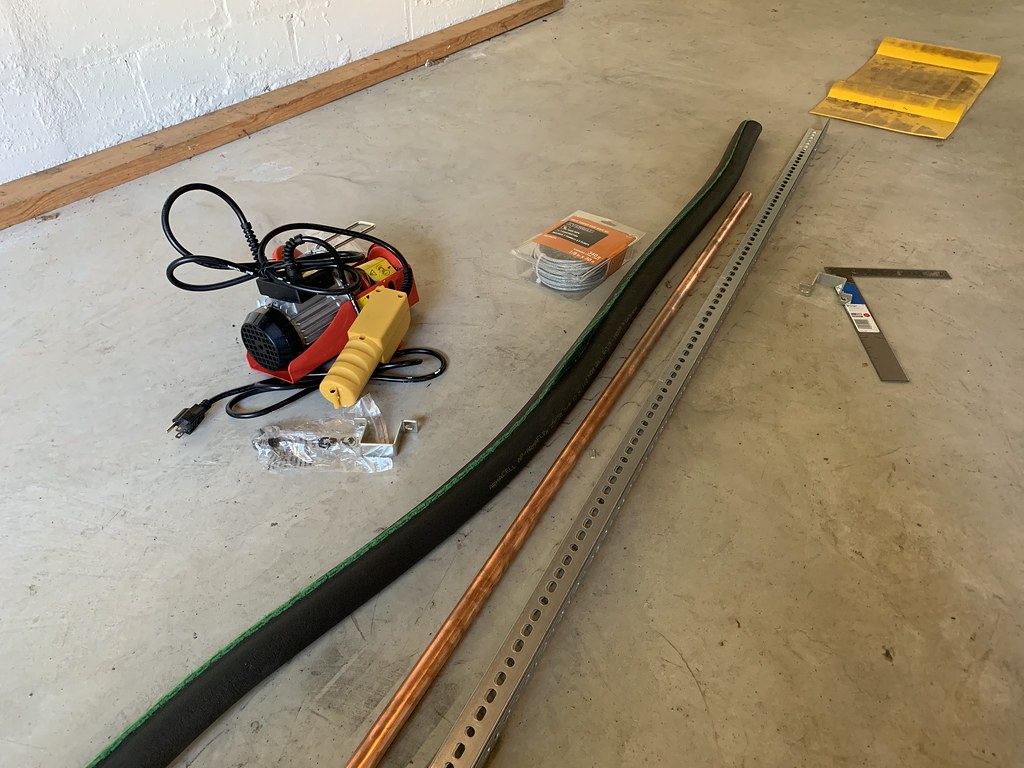 |
| Starting materials for the hoist - 8/25/2019 |
 |
| Hoist mounted - 8/25/2019 |
 |
| Flat hook - 8/31/2019 |
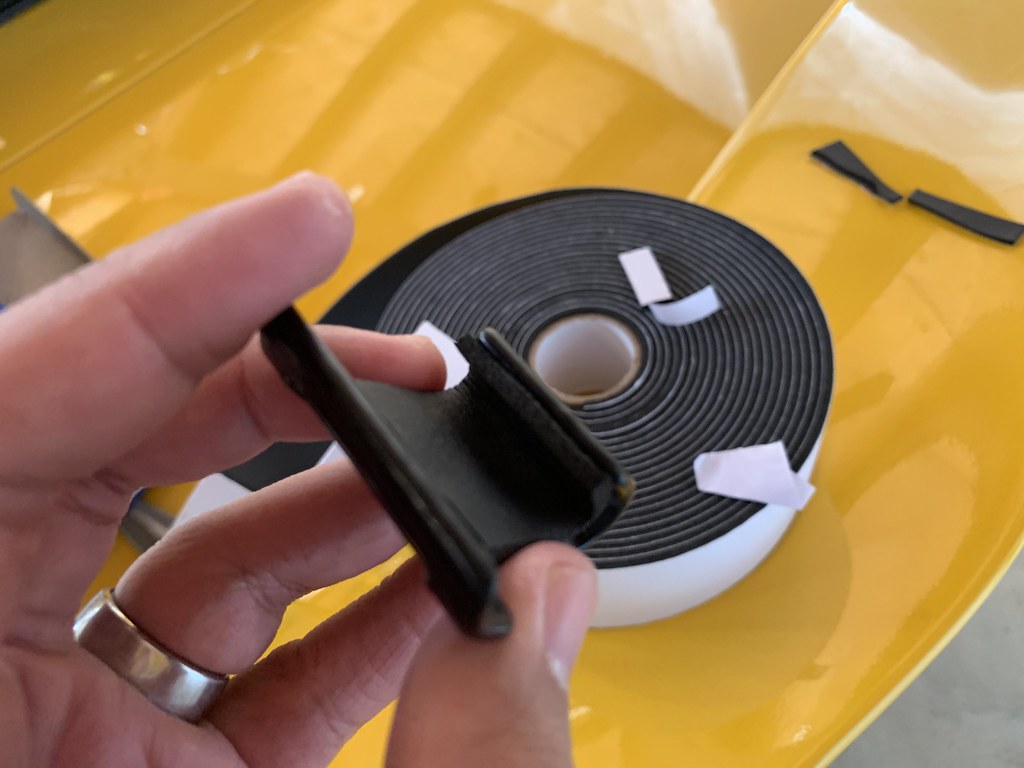 |
| Flat hook with foam tape - 8/31/2019 |
 |
| 1" wide tie down straps - 8/31/2019 |
 |
| Carabiner to hold the tie down strap - 8/31/2019 |
 |
| Top off - 8/31/2019 |
 |
| Top off - 8/31/2019 |
 |
| Finally, Top Off...it's been a long time coming! Seven Lakes - Bear Mountain - 8/31/2019 |
Sunday, August 11, 2019
Whack-A-Rattle
With some downtime in racing, I figured I'd take the opportunity to take care of a few things on Bumblestook. First I took out the passenger seat. It's being lent to a friend for Nationals. This was also convenient for me since I've been meaning to take care of some things on the passenger side and having the seat out of the way means I had more room to easily access various panels.
 |
| Passenger seat wrapped up to loan out - 8/10/2019 |
The passenger side hardtop weather stripping was sagging so it needed replacement. I've had the part for some time now and it was an easy enough swap. I'm surprised that these are just held on by a screw on both ends and friction. I'm going to have to leave the window up for some time to let it fully set.
 |
| New hardtop weather stripping - 8/10/2019 |
 |
| New hardtop weather stripping - 8/10/2019 |
 |
| New hardtop weather stripping installed - 8/10/2019 |
Next up was finally chasing this super annoying buzzing/rattle at 4500 rpms coming from the passenger side. I've been dealing with it for months and it's been driving me nuts. It takes away some enjoyment from driving the car and I often just put the windows down so the wind noise drowns it away. Well after checking every panel, I finally found the source. The top clip of the passenger side A-pillar was completely missing. I replaced it with a temporary clip and added some foam tape and took it for a test drive and I can finally drive with the windows up again without wanting to shoot myself. I'll order a new clip to fully secure it.
 |
| Source of the rattle - missing A-pillar clip |
I was also finally able to test out my new Quickjack 5000SLX. I was told that the 110V version doesn't have the same lifting speed as the 12V version but it lifted the car up super easily and at a height where I can slide underneath on a creeper with no issues (and I'm not a small guy). I was trying to find the source of a weird metal on metal knocking sound when inching forward or backward. I found nothing loose which is good since I was worried it was my diff going bad. I ended up driving the car to SJF Performance to have Steve give it a look and it seems that the passenger side rear upper control arm solid metal bushing has some play in it. At least I know now this is just an annoyance rather than a safety issue so I'm clear to take her back to the track but I'll likely get this replaced before the next track day in late September.
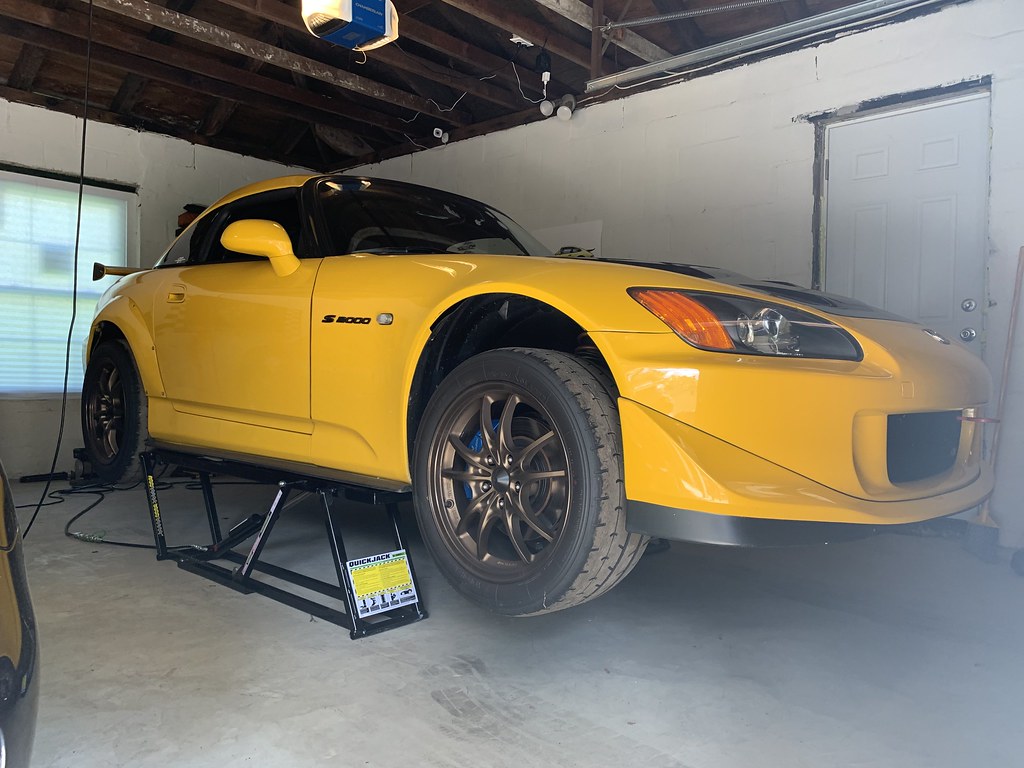 |
| Hooray for QuickJack and no more scary jack stands - 8/10/2019 |
Monday, July 22, 2019
New Battery...Who Dis?
As some of you that follow my blog know, in my last outing with Bumblestook during the 234 Tech Day, I had a bit of a battery problem with my Antigravity ATX-30. I contacted Antigravity and their assessment was that somehow my S2000 charging system overcharged the battery. We can't really tell for sure since it's illegal to ship a possibly defective battery even though the battery now works again so I can't really get the battery back to them for further analysis. They did, however, warranty replace my ATX-30. Due to my previous issue, they replaced it with an ATX-30-HD (heavy duty) version instead. This was just released and is a whopping $160 more than the ATX-30 (msrp) and no, I was not asked to pay the difference.
This does weigh a bit more than the ATX-30 I originally got (7lbs 12.5oz vs 5lbs 11oz) and it doesn't have their Re-Start technology which I'm fine giving up if this one works just fine. What it does give me is a pretty insane 970 CCAs which is a bit nutty because that's almost the same CCAs as the H6/Group-48 Antigravity battery I got for the Cayman. More importantly, it's focused to work on Performance Street/Race Vehicles, Larger Touring Bikes and, um...experimental aircraft. This means it has a full battery management system to protect from over-discharge/over-charge as well as thermal protections.
Needless to say, this battery is going right in and hopefully that's the last of my battery problems. Huge shout out to Antigravity for standing by their product and making sure I as well taken care of. They could've just sent me a direct replacement for my old one and had me scratching my head on whether or not I would put it back in. Instead, they listened to the my issue, the application this is for, and sent me a battery that at least on paper, is a more appropriate fit for what it's installed in.
 |
| New Antigravity ATX-30-HD LiFePO4 battery |
 |
| New Antigravity ATX-30-HD LiFePO4 battery |
Saturday, June 29, 2019
Tech Day at 234
It's been over 6 years since I've taken Bumblestook to Tony's house (a.k.a. 234) for a Tech Day mostly because for most of that time she was stored outside of NY and trailered only. When Tony told me he was going to do a tech day so we could work on his dad's S2000, I couldn't pass up the opportunity to head out there, hang out and take care of few issues I've been noticing with Bumblestook the past few weeks.
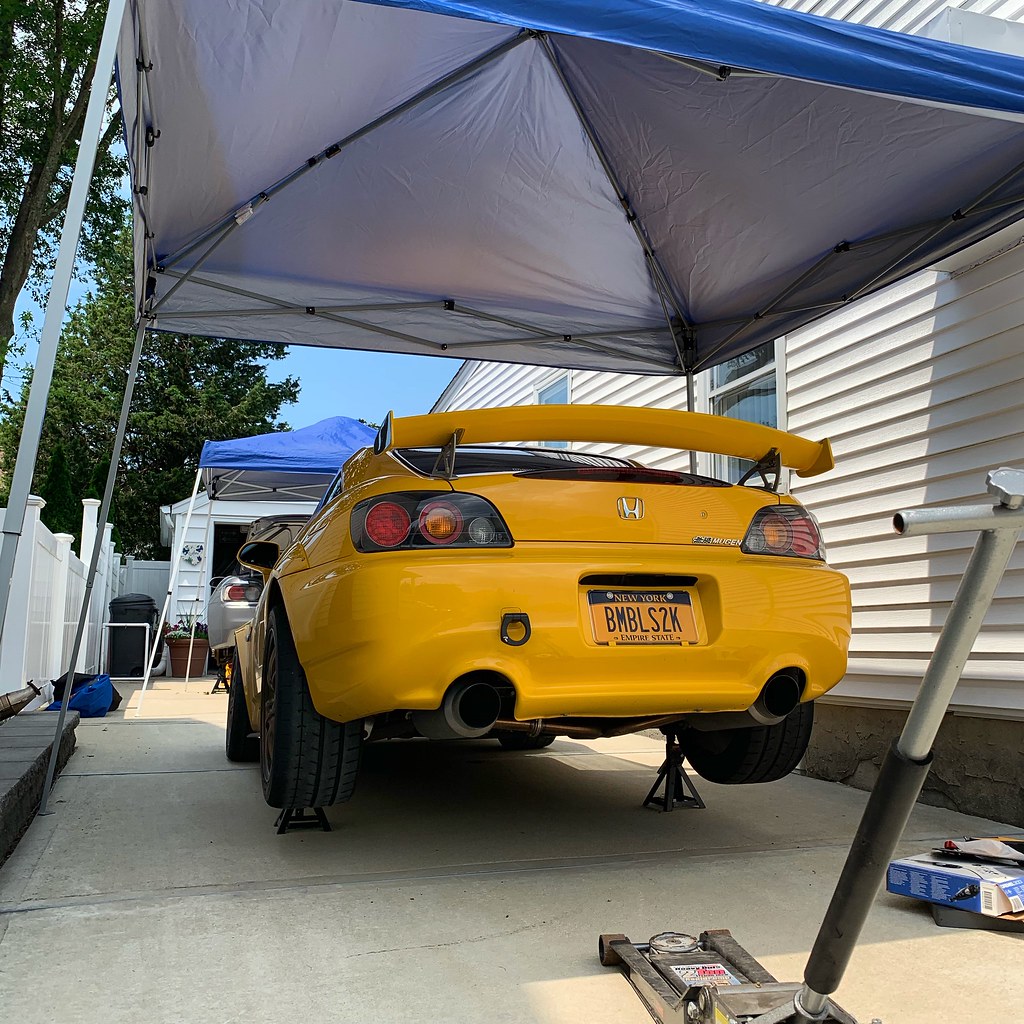 |
| Tech Day at 234 - 6-29-2019 |
Today was particularly hot, certainly the hottest day we've had this year and I got stuck in pretty heavy traffic so it took me almost 2 hours to get there. As soon as I pulled in and shut the car off, I realized I lost all power. I couldn't unlock my trunk and the dash wouldn't light up when I turned the key. We measured the voltage across the battery and it was over 14V but it was hot and there was slight deformation on the side facing the header. I suspected that perhaps the battery had gone into thermal shutdown and sure enough after letting it cool in the shade for 20 minutes, I was able to start the car again. This is unacceptable. A battery designed to be used in automotive applications should be able to handle the heat from an engine bay (and mine isn't even that hot since I have vents). I could've been stranded if I had stopped somewhere midway like a gas station. I ended up going to Autozone and picking up a Deka EXT14 battery which I've used several times in the past on both Bumblestook and Lupa and popped that in for now while I contact Antigravity about this issue. I didn't want to get stranded getting home and the last thing I need is a Lithium battery catching fire in the engine bay. I'm glad this issue surfaced where it did though.
 |
| Failed Antigravity ATX-30 Battery - 6-29-2019 |
Next I got under the car to try and figure out a weird rattle I was getting from the back of the car and got the shock of my life. The bottom bolt holding my driver side rear damper had almost fully backed out with the lock nut just barely clinging on.That could've ended up in a really bad situation if that bolt decided to eject itself at the wrong time so I'm glad I caught it. There's still a slight knocking sound I hear when I reverse slowly which I think is play in the diff. I might have to put in my backup diff soon but for now I'll just keep an eye on it since the car is generally driving just fine.
 |
| Source of the rattle - 6-29-2019 |
Next, I wanted to address the slight tire rubbing in the rear after I switched to the wider 255 Advan A052. A dremmel and some quick work to take off about 1/4" from the overfender and bumper tab and she was good to go.
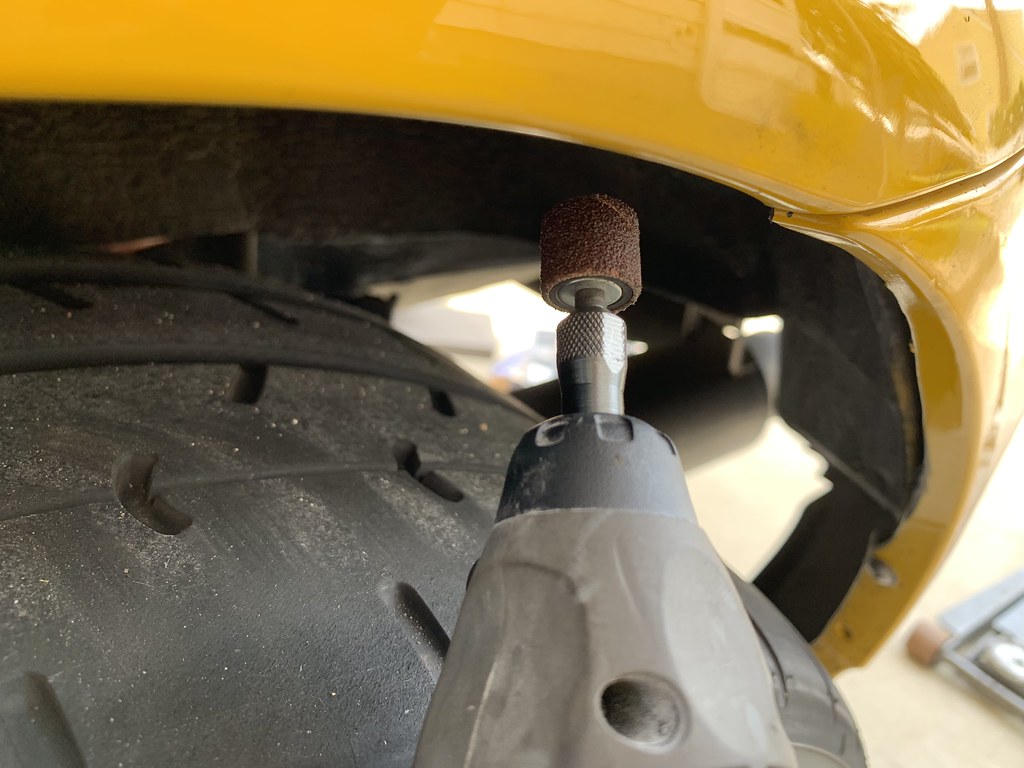 |
| Creating clearance for rear tires - 6-29-2019 |
I also started chasing around random rattles inside the cabin wrapping a lot of stuff in foam tape. I got most of the annoying noises out but I still have a few left to find. We finished up installing Eibach prokit springs on Tony's dad's car, put in a test pipe and fixed the stumbling idle caused by a sticky IACV, something I experienced myself early last year. It now looks great and drives like a champ. Of course, it wouldn't be a proper 234 tech day without Tony feeding us so much meat was consumed.
It was definitely good to see everyone again. Probably the best thing about S2000 ownership is the friends I've made throughout the years because of it. Big thanks to Tony and Jose for helping me out. Knowing that Bumblestook is back to normal and uncovering a fatal flaw in the Antigravity battery that could've bitten me hard at NJMP next month is icing on the cake.
Saturday, May 11, 2019
2nd Annual S2K TakeOver at NYST
Yesterday we had our 2nd Annual S2K TakeOver at the NY Safety Track in Jefferson, NY. It's an S2000 only (with one or two exceptions) track day organized by Brad from s2ktakeover. I got there the day before to meet everyone, do the track walk and meet new faces. Track days are always fun but being able to go to the track with all my S2000s brothers and sisters makes it extra special as we can all share in the love we have for these cars and enjoy them to the fullest.
It's always great seeing familiar faces and some new ones too. There were a number of people that have had their S2000s for a while now and are now just popping their track time cherry as well as a few that had come out with us in other cars before and have since bought an S2000 of their own. It's good to know that even though S2000 prices are creeping up, truly passionate owners still come out and use them for what they were made for.
The grip on this track has always been quite good and I was excited to drive it again. Of course as luck would have it, on the track day itself it was windy and rainy. The track was quite damp but thankfully no puddles on the racing line.
The track was pretty slick during the morning as a result. I was thoroughly impressed with these new Yokohama Advan A052 tires. At least in damp conditions they were quite fast and very controlled. I was logging data via the Track Addict app and was recording up to 1.3 laters Gs in the damp. Since they have stiff sidewalls I set the pressures to what I had on the RE71s (30psi front, 28psi rear). It seemed to like that quite well. I set the fastest NA lap time in the wet at 1:49 in session 2 second only in lap time to the supercharged DeftMotion S2000 who were also running the same tires.
They're also a bit wider than the RE71s for the same "size". I was actually rubbing a tiny bit on my rear bumper tabs on big dips in the road on my drive up to the track but at the track itself, I had no rubbing. I'll likely have to trim the rear bumper tab a bit more for perfect clearance.
After lunch time, I filled up the tank again and as I was about to go out in drying conditions, one of the cars on track had his oil filter back out and oiled the entire racing line. I went out for a recon lap and deemed it unsafe for me to continue so I parked it that session. It didn't look like things were going to clear up so I started to pack my stuff.
Of course as luck would have it the sun came out and dried the track completely for the last two session. As I was contemplating taking my stuff out again to get dry runs, I got a weather alert on the phone about a chance of a tornado in the area and there were clouds above us again. I decided not continue and of course, the tornado or the rain never came and people were putting some nice flying laps in the dry. I really wish I could've tested these in full dry conditions. The DeftMotion guys did set the fastest lap overall in the dry on the same tires and they were already old tires for them. They also said these tires love the heat but frankly even in cool conditions, I felt they were at least on par with RE71s. Granted, I didn't test them in full wet conditions with standing water so I'll reserve my judgement on them as a good "wet tire" until then.
And here's the video Kwesi Peters (Topi Digital) put together of the event.
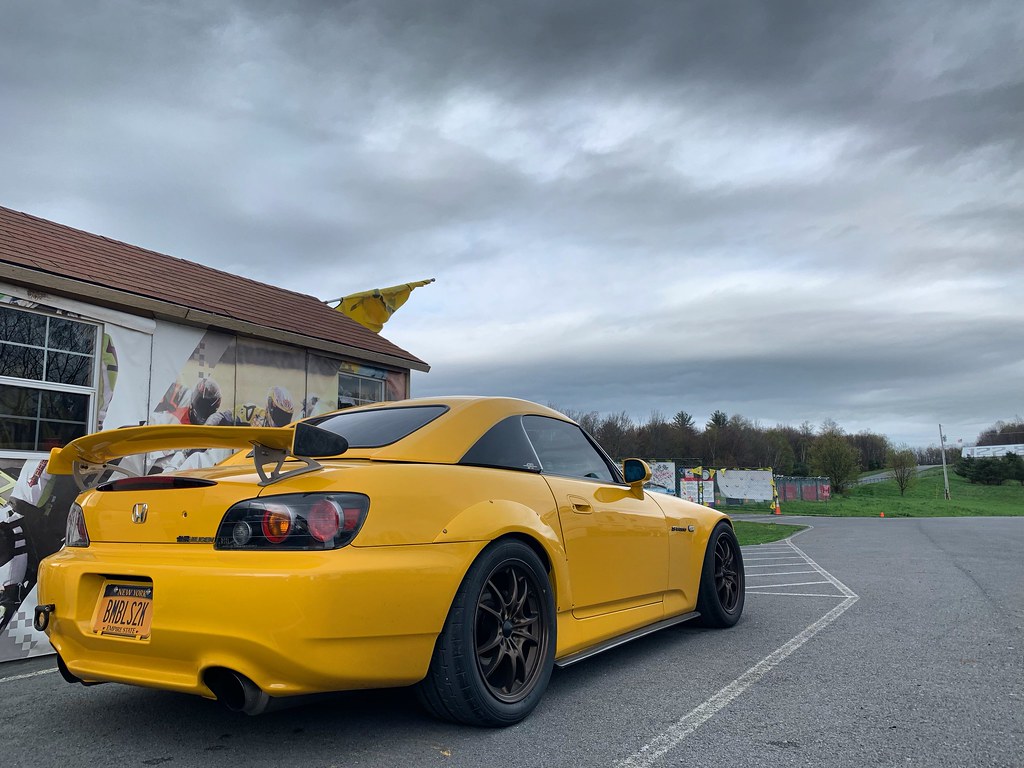 |
| Arrived at NYST - 5-9-2019 |
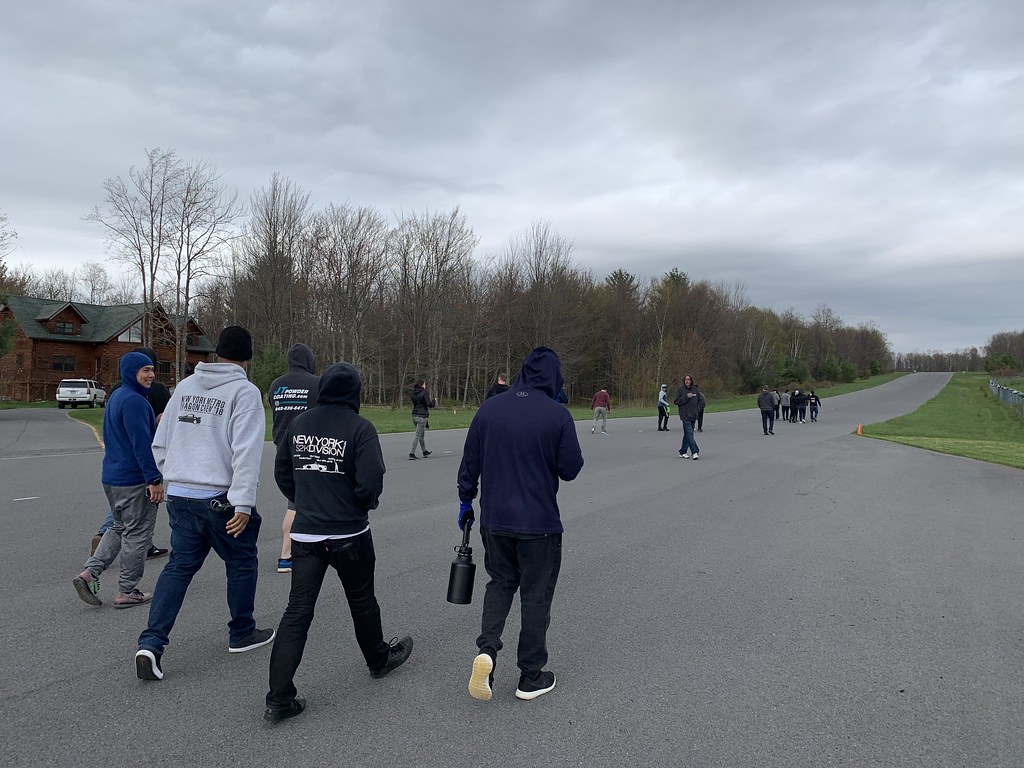 |
| Track walk - 5-9-2019 |
 |
| Track walk - 5-9-2019 |
 |
| Ready for track time - 5-10-2019 |
 |
| Ready for track time - 5-10-2019 |
 |
| Arrived at NYST - 5-9-2019 |
Session 2 in the wet, 1:49s - NYST 5-10-2019
They're also a bit wider than the RE71s for the same "size". I was actually rubbing a tiny bit on my rear bumper tabs on big dips in the road on my drive up to the track but at the track itself, I had no rubbing. I'll likely have to trim the rear bumper tab a bit more for perfect clearance.
 |
| Yokohama Advan A052 |
 |
| JJ lent me this sweet color matching compressor |
 |
| Conclusion of another fun and safe track event - 5-10-2019 |
S2K TakeOver NYST Feature Video
By: Kwesi Peters (Topi Digital)
By: Kwesi Peters (Topi Digital)
Tuesday, May 7, 2019
Updated Oil Analysis for 2019
Finally got my oil analysis back which includes wear from the track day at The Glen towards the end of last year. Everything's looking pretty stable which is great. I think an individual oil analysis is good but being able to see the historic trend is even more valuable.
The little shocker at the dyno a few weeks ago with my power being down got me a bit worried and as the data and evidence continues to show no issues with the engine, I'm more and more certain the worn down clutch was 100% to blame. Great seeing this before we head out to NYST this week for the S2K Takeover.
 |
| Blackstone Labs oil sample results - 4-26-19 |
Friday, May 3, 2019
Plastidip and Hardtop Locks
I probably should just clear bra the car if I really cared but the black part of the CR lip has already taken a bit of a beating from road debris in just a year. When the car was resprayed, the entire bumper was painted yellow and the bottom piece painted over black but obviously rock chips and stuff cause the underlying yellow to show.
It doesn't make sense to keep doing a "proper" paint job on this part alone since I'm sure it'll just keep happening and I'm not really trying to be super precious when I drive her around (that takes away from the pleasure). I was initially thinking of wrapping that part in black vinyl but instead I decided the easiest thing to do is just to spray that part with matte black plastidip. It's easy to apply and I can keep repeating the process as many times as I need to make it look normal again.
It's not perfect but at least it doesn't look too bad and I won't be upset if it chips again. It's actually one of the best uses of plasti-dip I can think of. While I was at it, I also plasti-dipped over the Zunsport logo on the grill we installed last weekend. I don't really mind that it says Zunsport since I really like what the company makes but it's a bit of an eyesore having a white logo in the front of the car where there's nothing else white.
Also, after much waiting, I finally got new hardtop locks from Heel Toe Automotive. I already had their locks but one of them was no longer locking and while I'm sure the hardtop is perfectly safe with just one side locked that bothered me so I installed new ones.
I'm sure a few people were wondering why the heck I was driving Bumblestook around after dropping Kay off at the Meadowlands for the NJ ProSolo this weekend. Partly it was just to keep putting miles on the clutch but more importantly I needed to grab a datalog of the car now that the clutch is broken in to make sure my AFR is all safe for next week's track day.
 |
| Black paint chipped from road debris - 5-3-2019 |
 |
| Plasti-Dip with "Can Gun" - 5-3-2019 |
 |
| After about two coats - 5-3-2019 |
 |
| Zunsport logo blacked out |
 |
| New hardtop locks - 5-3-2019 |
 |
| Rare instance of both cars being out a the same time |
Saturday, April 27, 2019
Advan A052, Good-Bye Whinebro, Zunsport Grill
Now that Bumblestook is, for the most part, sorted and operating normally again, I can get back to refining her. But before that though, Yokohama released a new version of their Advan A052 tire. This new version has a different part number and is listed as 7/32" tread depth which now makes them legal for SCCA Street Tire classes. Although Bumblestook doesn't compete in anything specific to SCCA anymore, I thought it'd be good to pick up a set of 255/40/17 Advan A052 and test them out so I can make a decision on whether I want to move to this tire for Kay.
My first impression with this tire is that the tire wall is stiffer than the Bridgestone RE-71R. They also don't have the little "lip" that the Bridgestone has to protect the rim if you suck at parking and get too close to a curb. I'm very familiar with how Bumblestook feels on different tires and it seems the front is a bit more responsive and these tires are definitely sticky. Time will tell how good these are in different temperature conditions. There's only so much you can feel on public roads.
The main focus of Bumblestook's build is primarily a street car that can be used for anything, "one car to do it all". One of the little things that has been annoying me was the constant electrical whining sound from the fuel pump. I've had a Walbro 255lph fuel pump for several years now and while it's super convenient because it's a drop-in replacement for the stock fuel pump, it's also known to be a bit noisy (a.k.a "whinebro"). I have no need to have a higher rate fuel pump since I don't plan on increasing power any further so I ordered a new OEM fuel pump assembly. It's more than adequate for my power needs and is ultra quiet.
I've been getting a really annoying rattle from the front bumper. This was due the grill being loose and rattling around due to a broken tab. To fix this without having to buy a new grill, I picked up some 4.7mm push in clips and SJF drilled holes so everything is held securely in place.
Finally, I've been wanting to add a mesh grill to prevent leaves from getting into the intake snorkel. I've been using Zunsport grills from the U.K. on the Cayman and found their quality to be very good so I checked if they had any S2000 ones and sure enough they did. This should've been an easy clip-on installation but with my front tow hook installed, SJF also had to cut some of the grill away to clear it. It's actually made of pretty thick steel and not just chicken wire so a cutting wheel was required. A quick splash of paint was thrown on to prevent rusting. To fully secure it, we also added two zip ties to hold it onto the center part of the grill. I think it came out really well and the added protection to the various radiators and coolers behind it is always a good thing.
Thanks again to SJF Performance for making time to get these out of the way. I only have to chase one final rattle somewhere on the passenger side interior that only occurs at 3500 rpms and I'll be completely happy with the comfort level of the interior.
 |
| Super Fresh Advan A052 - 4-27-2019 |
 |
| Super Fresh Advan A052 - 4-27-2019 |
 |
| Tires getting mounted |
 |
| Tires mounted and back on the car |
 |
| Taking out old fuel pump - 4-27-2019 |
 |
| New fuel pump and filter installed - 4-27-2019 |
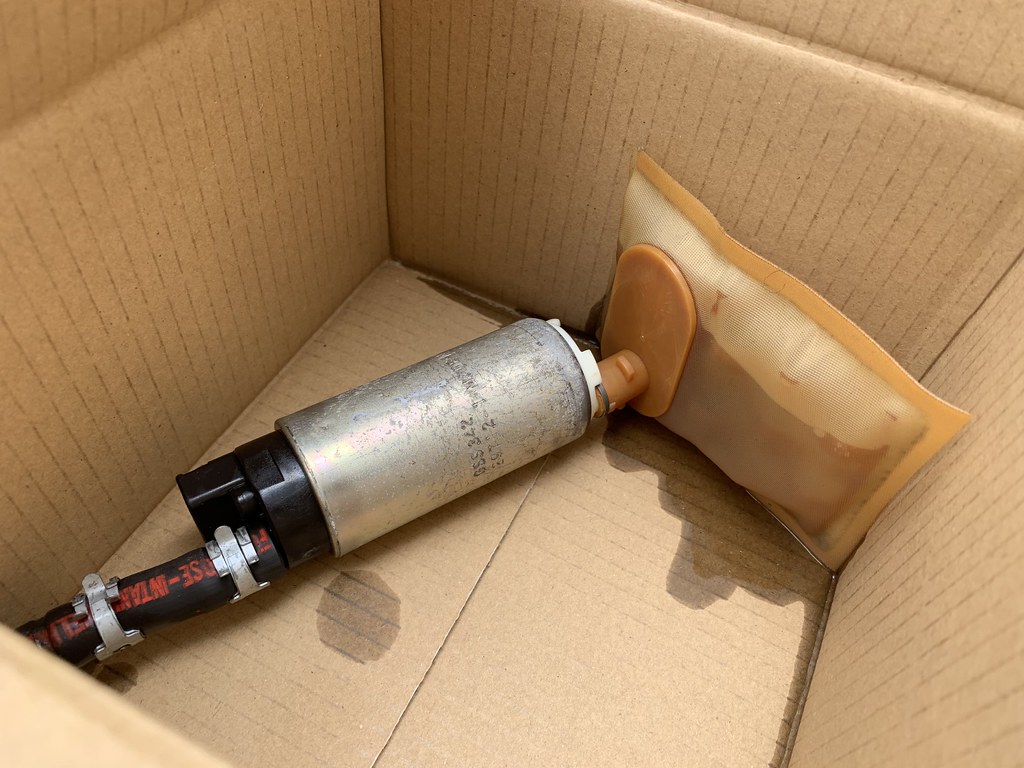 |
| Old Walbro fuel pump |
 |
| Loose grill, Comparing clip with the existing bumper hole |
 |
| New hole drill and clip installed |
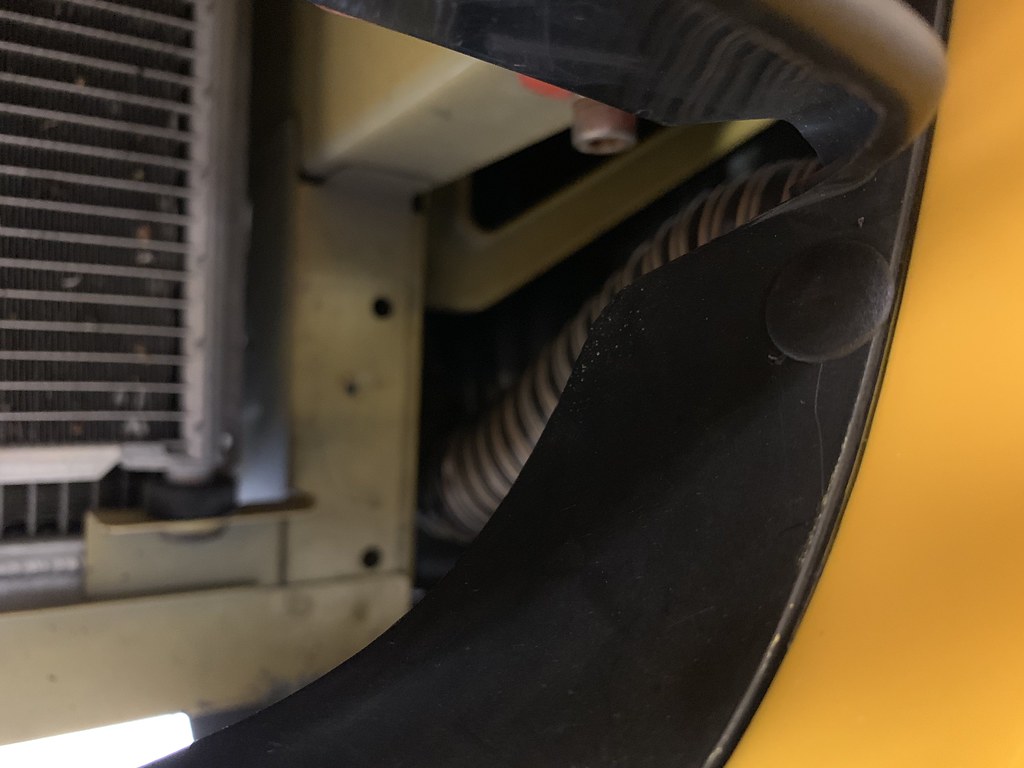 |
| New hole drill and clip installed |
 |
| Adding tape to prevent scratching of bumper cover |
 |
| Hole for Front Tow Hook done |
 |
| Zunsport grill installed - 4-27-2019 |
Subscribe to:
Posts (Atom)

